This 5-Minute Stretch Sequence Will Have You Doing a Split in No Time
Not only is a split more accessible than you might think, but it's a super healthy milestone to aim for, says Kristina Nekyia, founder of Los Angeles flexibility training studio Fit & Bendy. "There are so many benefits to flexibility, because flexibility is all about increasing our ability to move in the world," says Nekyia, who has a background as a dancer, Pilates instructor, and contortionist. "It requires a very deep knowledge and understanding of your body—you learn something abut yourself through the process." She adds that flexibility can help make you stronger in pretty much any other fitness endeavor, from running and cycling to surfing and dancing. (And let's not forget that splits just look fun.)
If you're new to flexibility training, Nekyia recommends starting with a front split, where one leg is coming out in front of you and the other is extending behind you. "It doesn't matter how close you get to the floor—if you've got that form, you're doing a split," she says. "Your back leg will be bent for a pretty long time until you can get all the way down." The other option is a middle split, wherein both legs are stretched out to the sides. However, Nekyia says this variation is difficult for most people—on both a physical and emotional level—due to our complex pelvic anatomy.

{{post.sponsorText}}
So, how to actually train for a front split? It's all about increasing the flexibility in your hamstrings and your hips while strengthening the opposing muscles, says Nekyia, who created a stretch sequence to get you started. Before going into the stretches, she recommends warming up your body with jumping jacks, burpees, or a 10-minute dance party. "Your muscles are going to have the best results if you're a few degrees above your normal body temperature," she says, noting that you can also do the stretches directly after a workout. "It's best to be consistent. Do short sessions three days a week and you'll start to see a change. Going at it super hard isn't going to make you progress any faster. It's about consistent training over time." Spirit fingers to that.
Step 1: Stretch the hamstrings
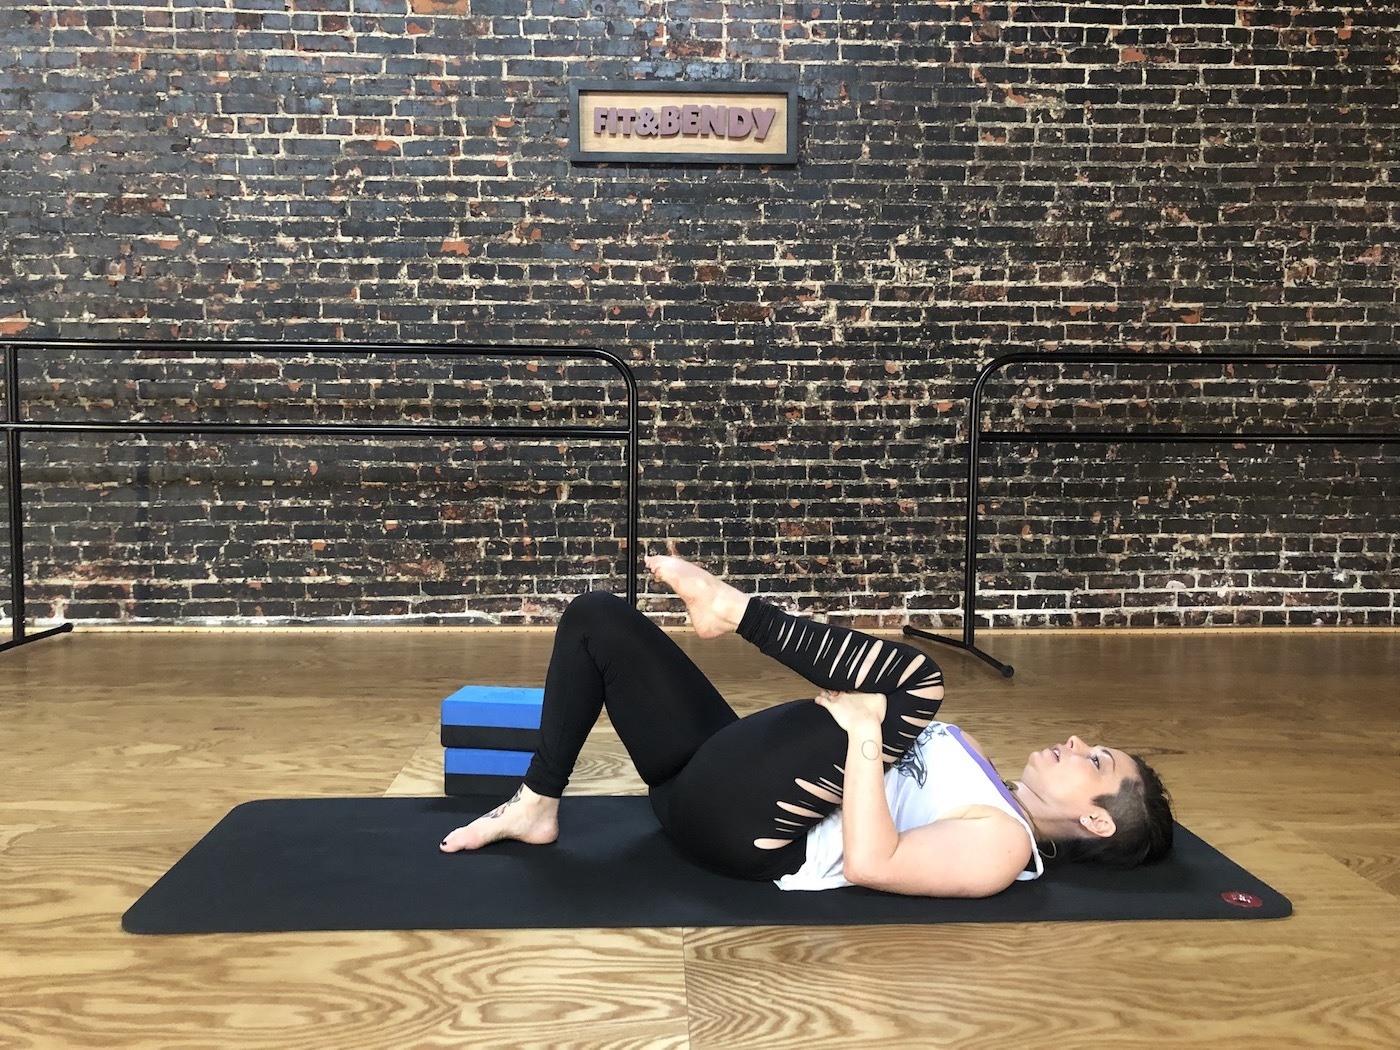
1. The first move is called a nerve glide, as it helps create movement around the sciatic nerve—a major nerve that runs down the back of the leg into the foot. "This nerve can be one of our limiting factors in our flexibility," says Nekyia. Start with your right leg bent and pulled into your chest with pointed toes. Then, straighten the leg as much as you can while squeezing the muscles around your knee, keeping your thigh on your belly. "Your leg might shake a little bit and that's perfect. I call it the 'chihuahua point'," Nekyia says. Then, flex the foot, take a breath, bend the knee, and relax. Repeat for 20 to 30 seconds.
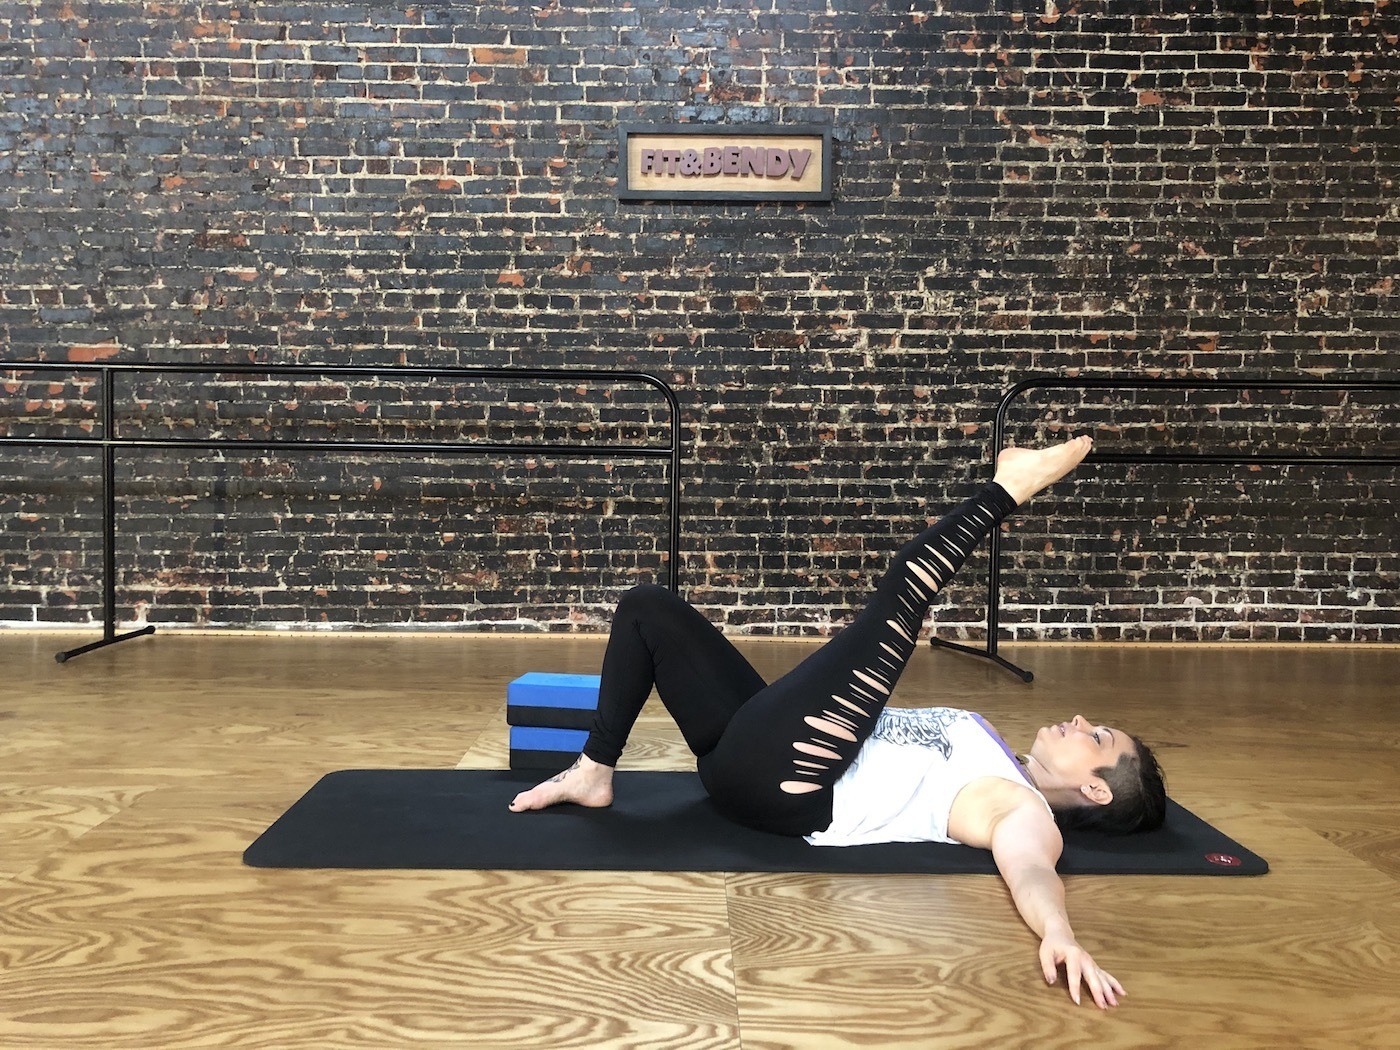
2. Keeping the right leg pulled into your chest, squeeze your knee muscles as hard as you can, let go of your leg, and try to straighten it all the way. Why so much focus on the knee muscles? "The more the muscles in your knees can work, the more it helps to open the tightness in the back of the leg," says Nekyia. Bend the leg in and relax it, and then straighten it out again while engaging the knee muscles. Repeat for 20 to 30 seconds.
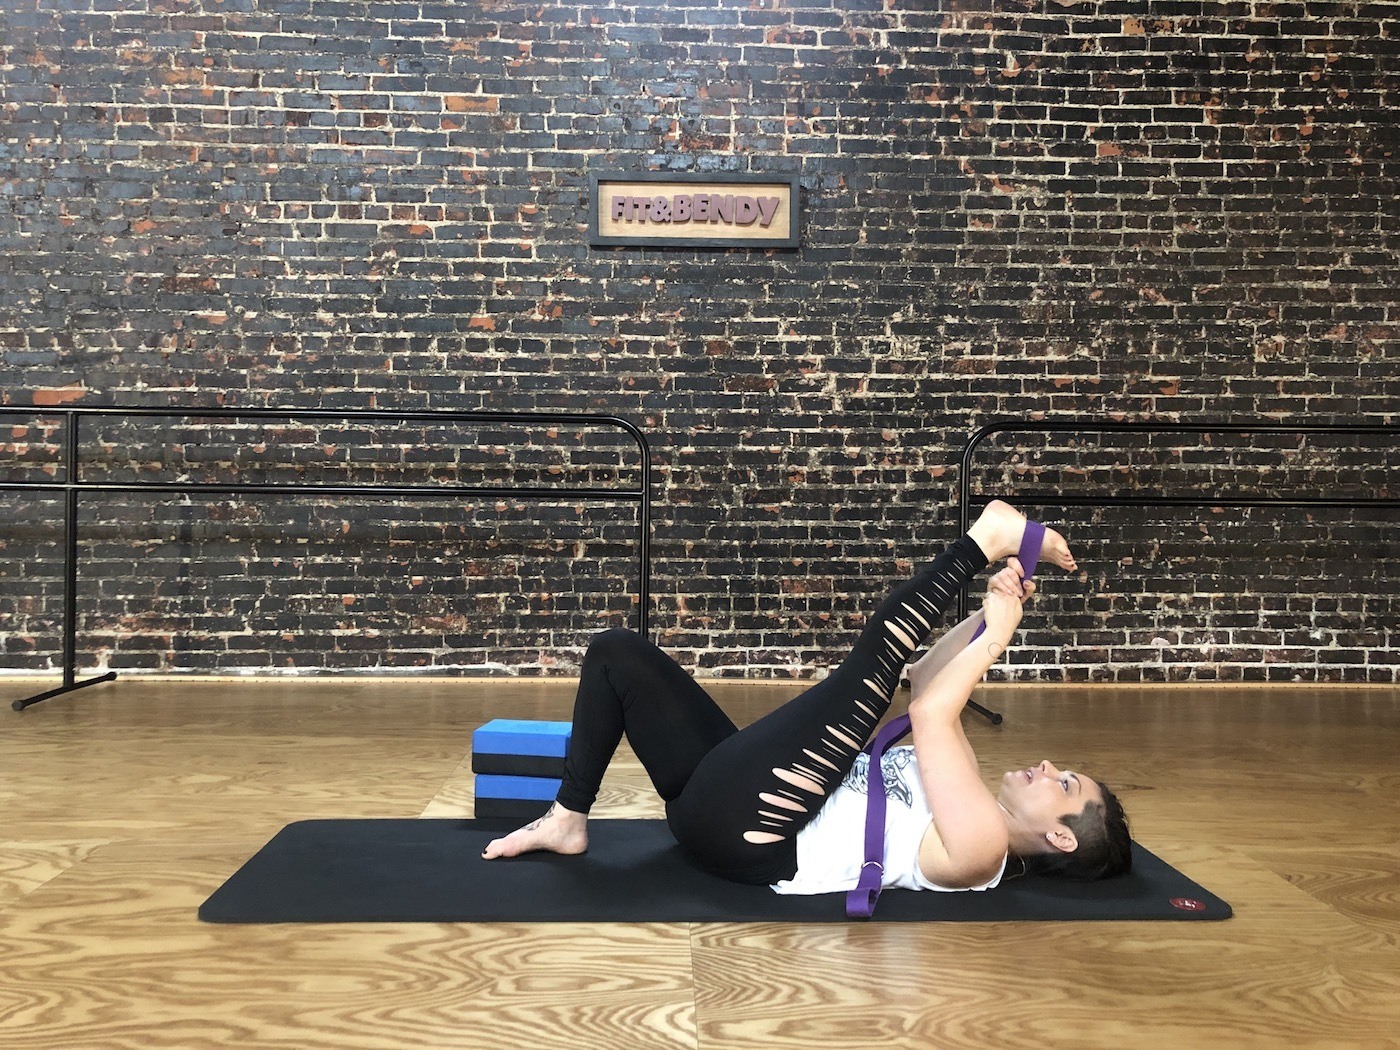
3. Grab a yoga strap or towel and loop it around the arch of your right foot. Try to straighten your right leg out all the way. "Don't yank on the strap—just apply enough pressure so you feel a light stretch," says Nekyia. As you hold the leg out straight, feel where it's tightest in the back of the leg and squeeze those muscles. Then, engage the knee muscles again and see if the leg comes closer to your body.
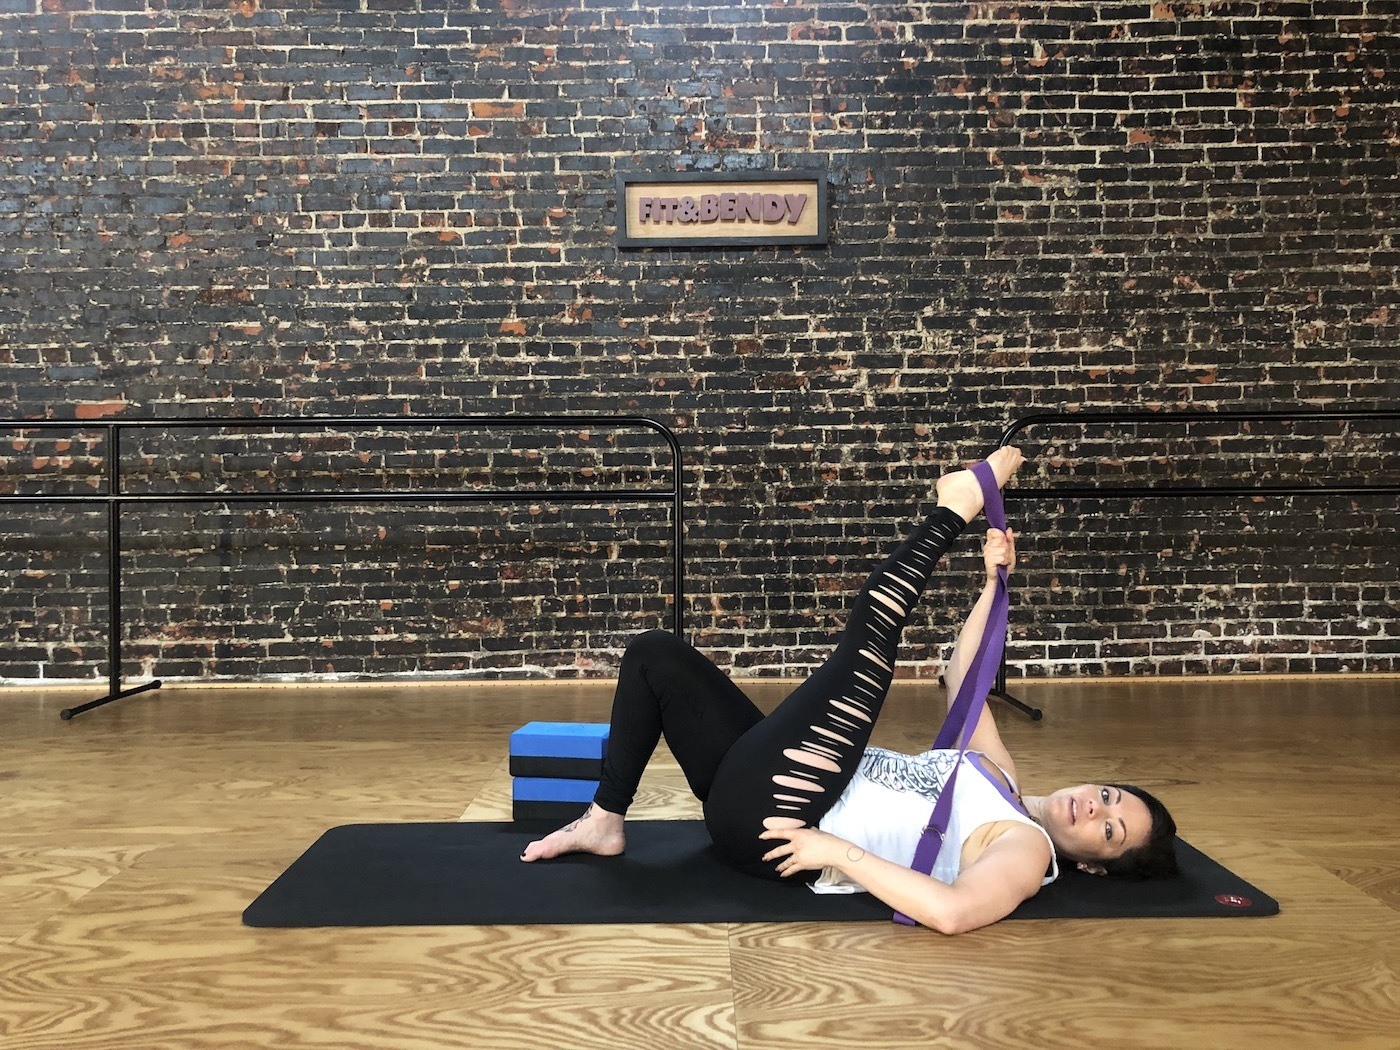
4. Keeping the right leg lifted, use the strap to move it slightly across the body so your right foot is above your left eye. Flex and point your right foot, then bend and straighten your leg. Take the strap off and shake out your leg.
5. Repeat the full hamstring sequence on the left leg.
Step 2: Stretch the hips
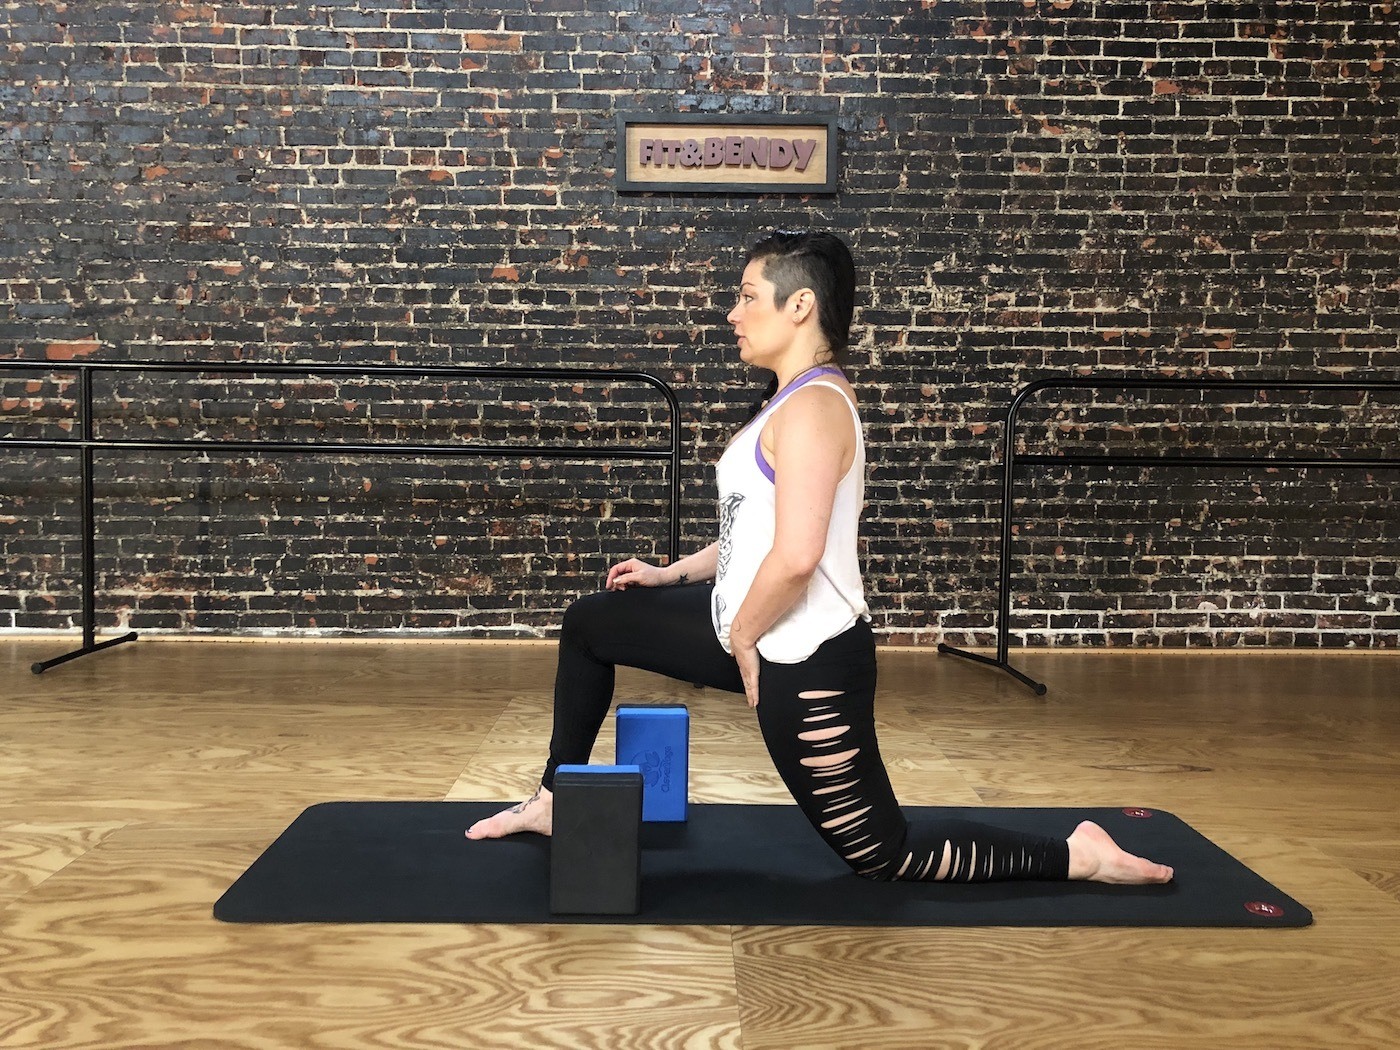
1. "Just like we were working with the knee muscles to open the hamstring, we want to work with the butt muscles to open up the hip," says Nekyia. "You always want to look at the muscle opposite the one you want to stretch—you really want to strengthen it and get it to work." For the first part of this hip opening sequence, come into a lunge with the right leg behind you, resting the knee on the ground. Squeeze your lower glute muscles and upper hamstrings—the ones around the crease of your backside—and use that engagement to push your right hip forward. Tuck your pelvis under and use your abs to lift your torso up out of your hips. Make sure to keep the pelvis squared off towards the front of the room. Hold for 20 to 30 seconds.
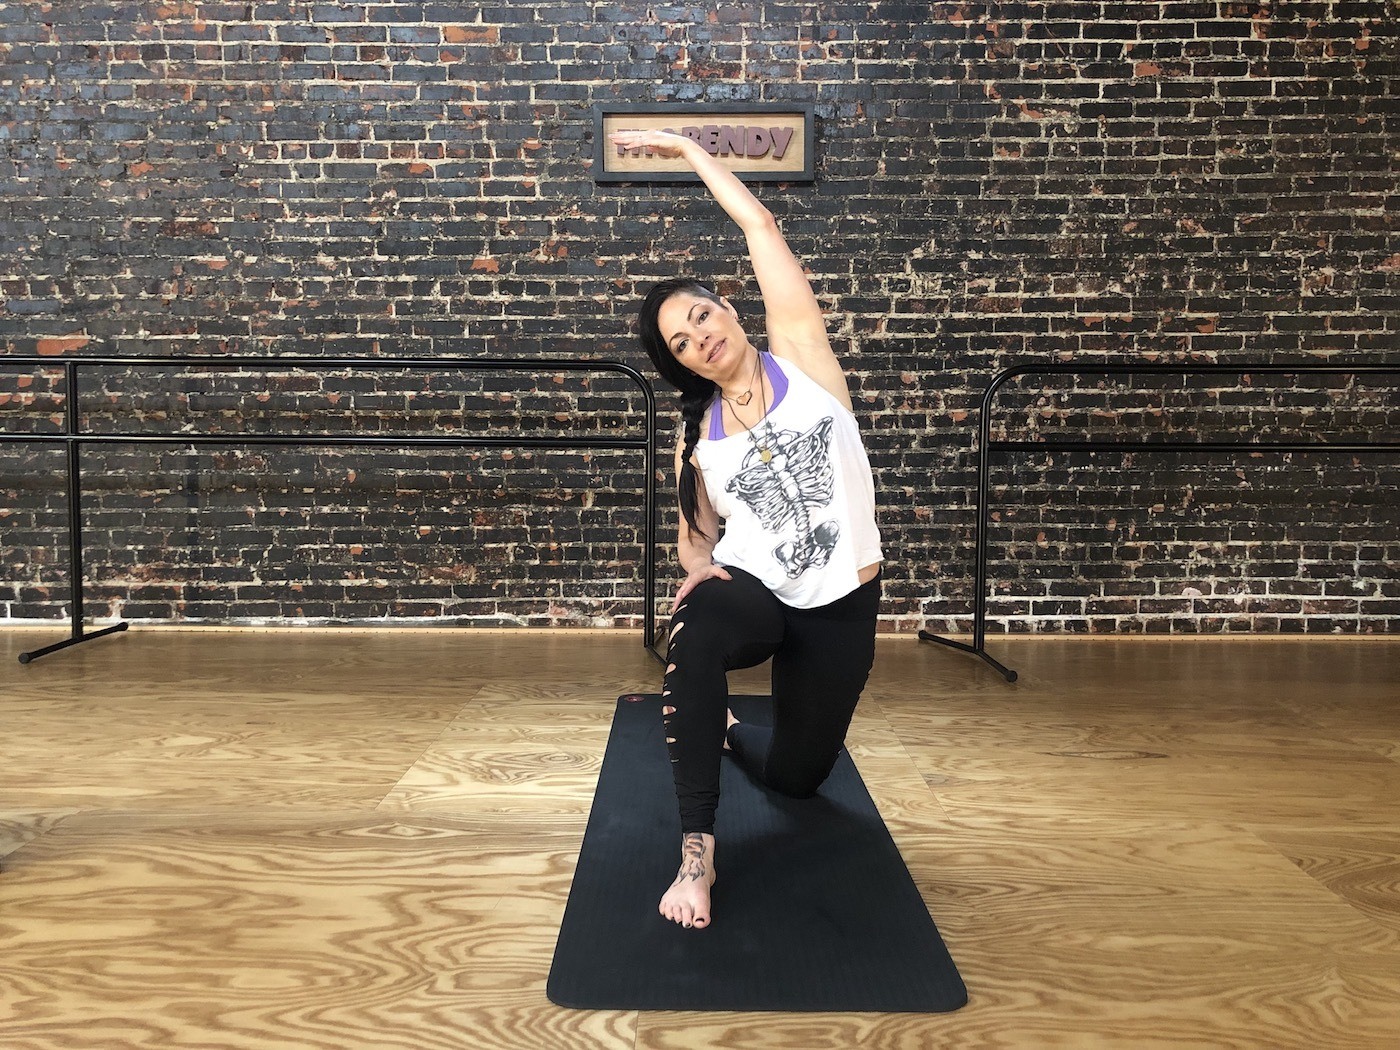
2. From here, imagine that you're trying to slide yourself forward using your front heel—you'll feel both legs turn on. Turn the lower part of the right leg in and lift your right hand up and overhead. Push the right hip forward and slightly out to the side while engaging the lower right glute and upper right hamstring.
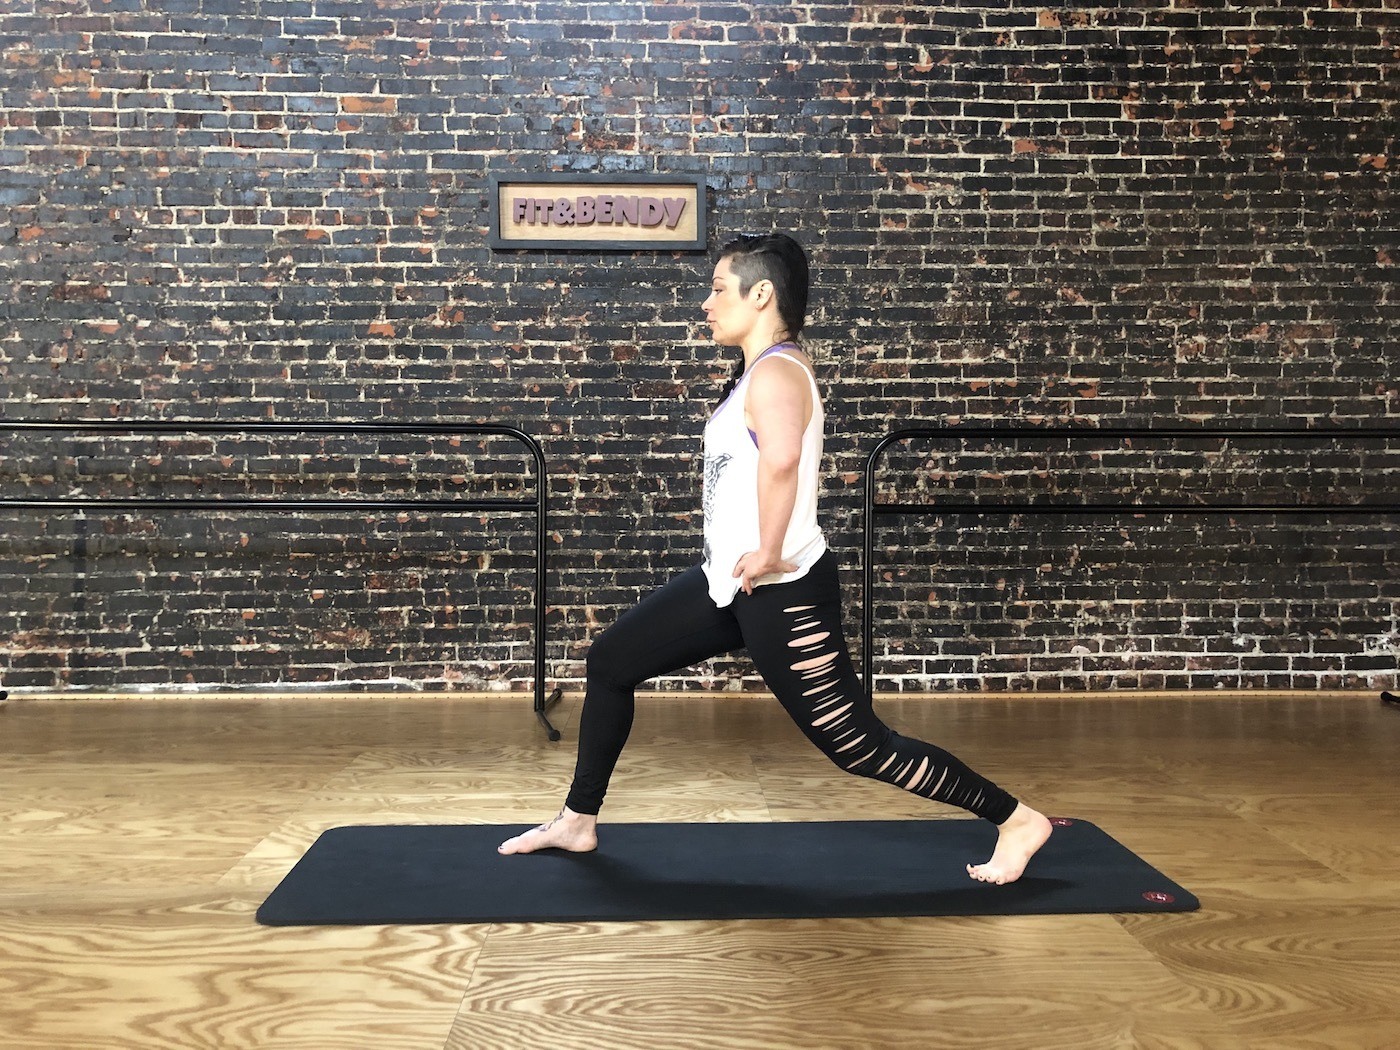
3. Curl the toes of the back foot under and lift your back knee off the floor, keeping both knees bent. Tuck the pelvis under slightly and start to slowly straighten and bend your back leg, using your abdominal muscles to lift your torso out of your pelvis. "You're building the balance muscles which is good—you don't want to develop flexibility in a vacuum," says Nekyia. "You want to have balance and strength and stability because otherwise you can't support the range of motion that's available to you." After about 20 seconds, interlace your hands in front of your chest and extend them out in front of you. Then take a few breaths with the arms extended overhead, and come down onto your back knee.
4. Repeat the full hip sequence on the other side.
Step 3: Prep for a split
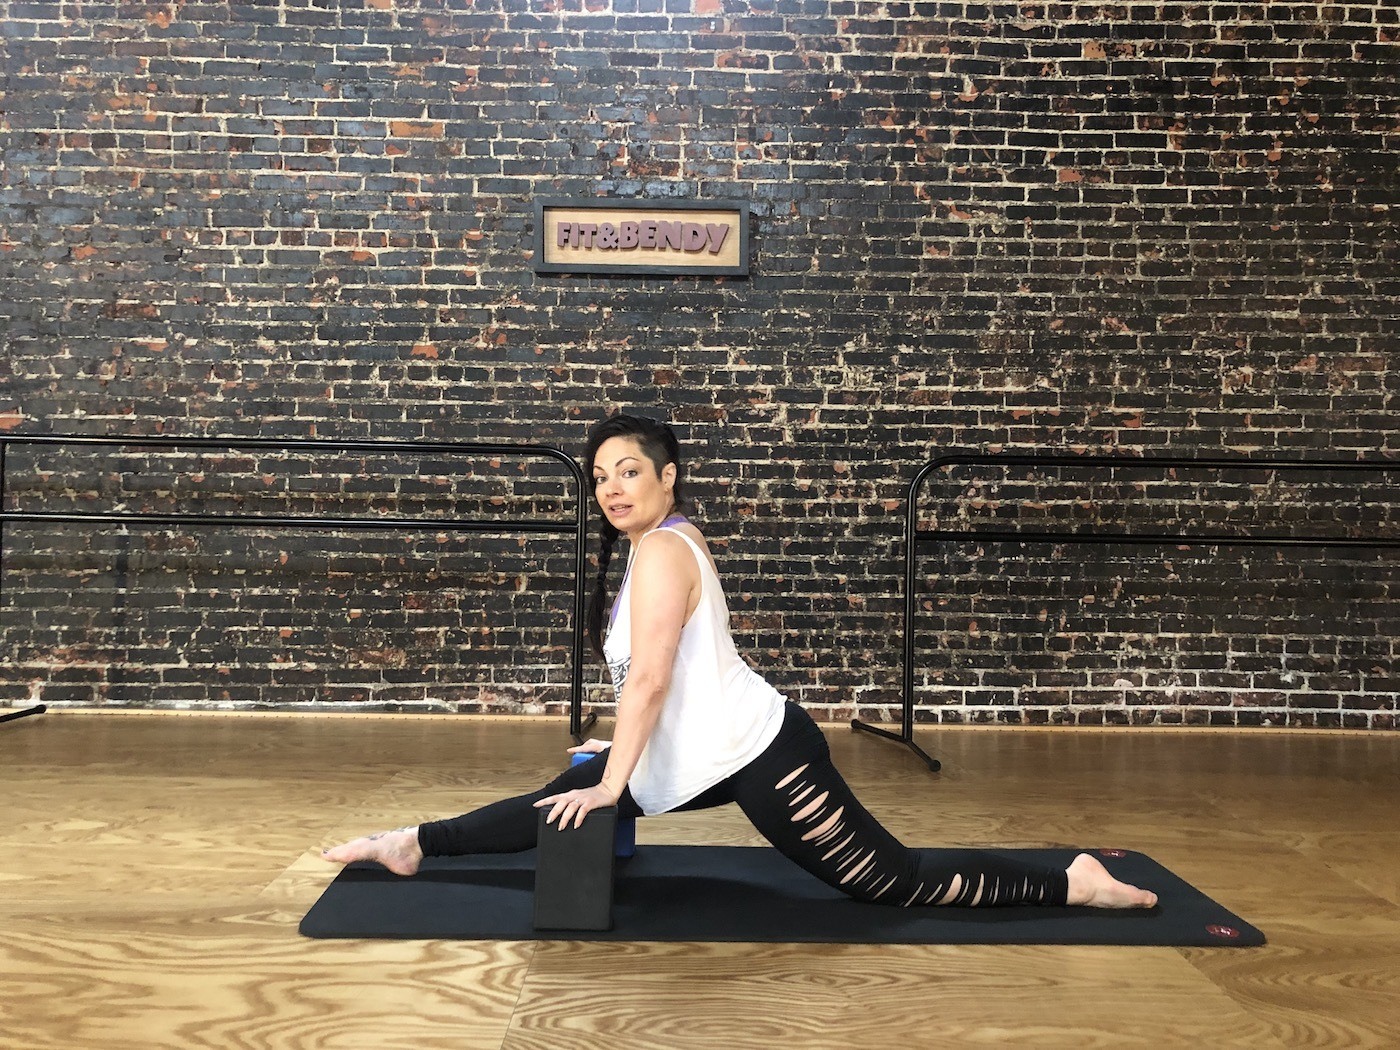
1. Using yoga blocks or books for balance, come back into a lunge with your right knee down on the floor. Engage the lower glutes and upper hamstrings of your right leg to guide your hips forward. At the same time, squeeze your left knee muscles to straighten your left leg and slide the left foot forward as much as you can while keeping your hips even with each other. Hold for 20 to 30 seconds, and then slide the left foot back until it's bent in a lunge. Come out of the stretch.
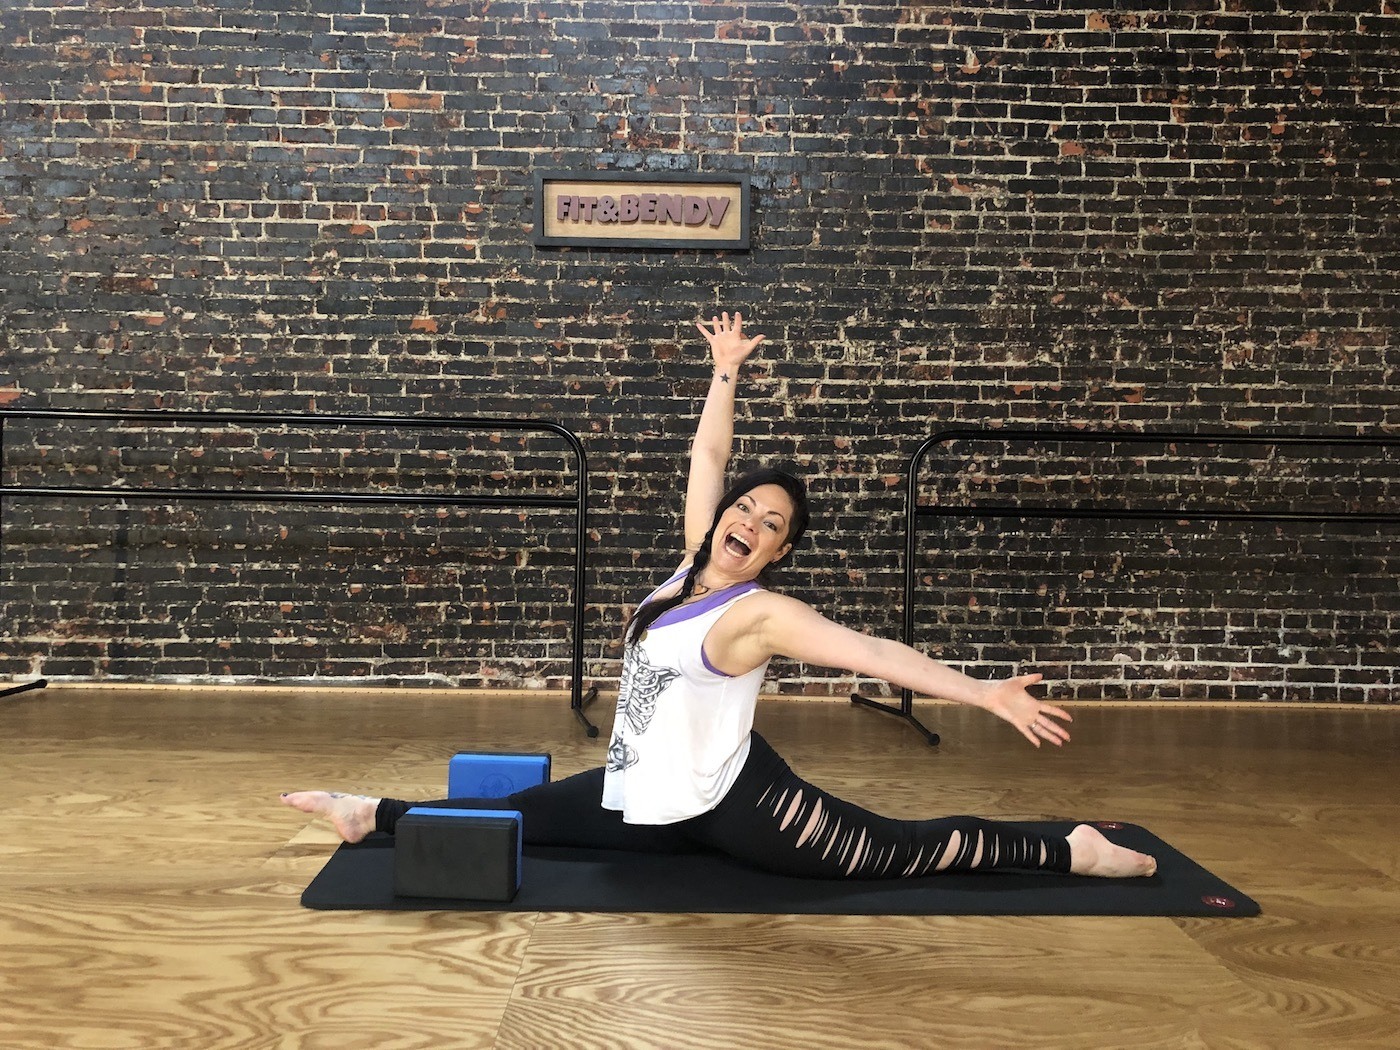
2. Repeat on the other side. Remember, it's fine if you don't get all the way down to the floor like Nekyia, above—your flexibility will increase over time.
Why stop stretching there? Check out these guides for loosening up your calf and quad muscles.
Loading More Posts...