And there's no shame in taking a knee, using a block, or making any other tweak you feel is necessary to deepen your connection. Bottom line: You know your body better than anyone else. “It’s important to view adjusting poses to fit our daily needs, not as a ‘lesser than’ experience that sometimes gets associated with the word modification,” says Heather Peterson, chief yoga officer at CorePower Yoga. “Instead, think of each day as an inquiry into what would most benefit your body, customize each pose and practice to make the pose fit you rather than you fit the pose.”
Ready to get bendy? For each of the easy-to-modify yoga poses below, there are three different ways you can alter it, depending on your reasoning: reduce the depth, change the angle of the original shape, or add a prop—like a block or a yoga strap. Peterson recommends trying out each based on how your body feels in the moment.
Scroll down to see the how to modify common yoga poses for beginners.
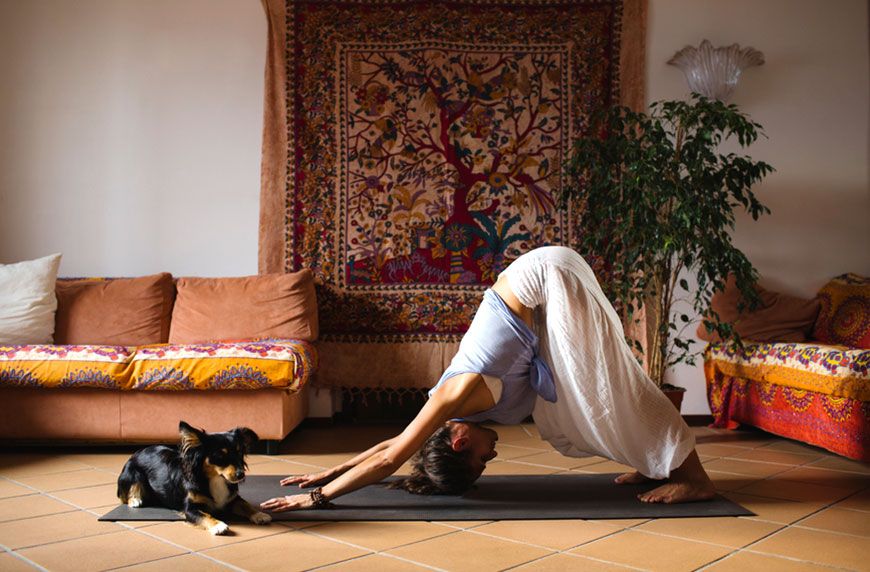
1. Downward-facing dog (adho mukha śvānāsana)
How to do it: Come onto your hands and knees, hands under shoulders and knees under hips. Spread your hands wide and press the index finger and thumb into your mat. You’ll notice your elbows turn out slightly. Start to lift the tailbone and press your glutes up, flaring your sitz bones toward the sky, and lengthening through your hamstrings. Concentrate on keeping your stomach close to thighs, ears in between biceps, and heels pressed gently toward the floor—they might not touch though. Breathe deeply, soften, and relax into the posture. Hold for 5–10 breaths.

{{post.sponsorText}}
The modifications
Reduce depth: Bend your knees, which’ll reduce tension in the hamstrings, so you can prioritize your long spine
Change angle: Widen your hand placement, turning your hands slightly away from the midline while you maintain spread fingers and active palms pressing into your first finger knuckle pad. “Start with small adjustments here and keep going until you find the sweet spot for your shoulders and neck,” says Peterson.
Add a prop: Put a block under each hand, curling your fingers over the front. This will bring the floor up to meet you.
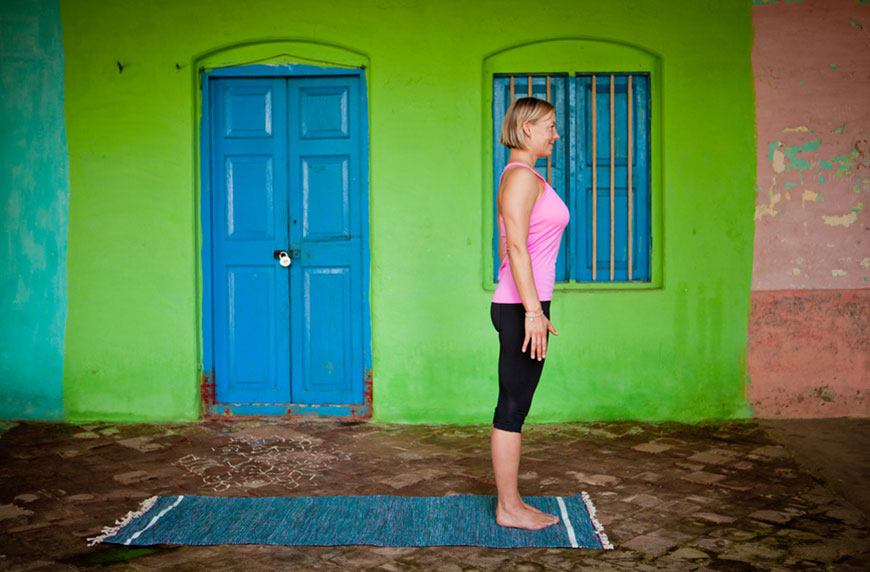
2. Mountain (tadasana)
How to do it: Stand with feet hip-width apart. Spread the feet and place the weight evenly through entire foot from front to back and side to side. Engage the muscles in the thigh to hug the bones. Inhale arms overhead. Reach up into the fingertips, and top of your head, while pressing down into your feet. Close your eyes and take long, slow, deep breaths in and out of your nose. No strain, no struggle. Breathe, relax, feel, observe, and allow. Hold for 3–5 breaths.
The modifications
Reduce depth: Bring your hands to your sides, rather than above your head, to reduce any aggravation of the neck or shoulders.
Change angle: Widen your stance slightly wider than hip-width, which can help reduce low back pressure or sensation.
Add a prop: This one actually cranks up the intensity a bit. Place a block between your thighs to fire your inner thighs-adductors. “Your goal is to isometrically drag your heels apart on your mat to create balanced action of inner thighs and outer hips-abductors,” says Peterson.
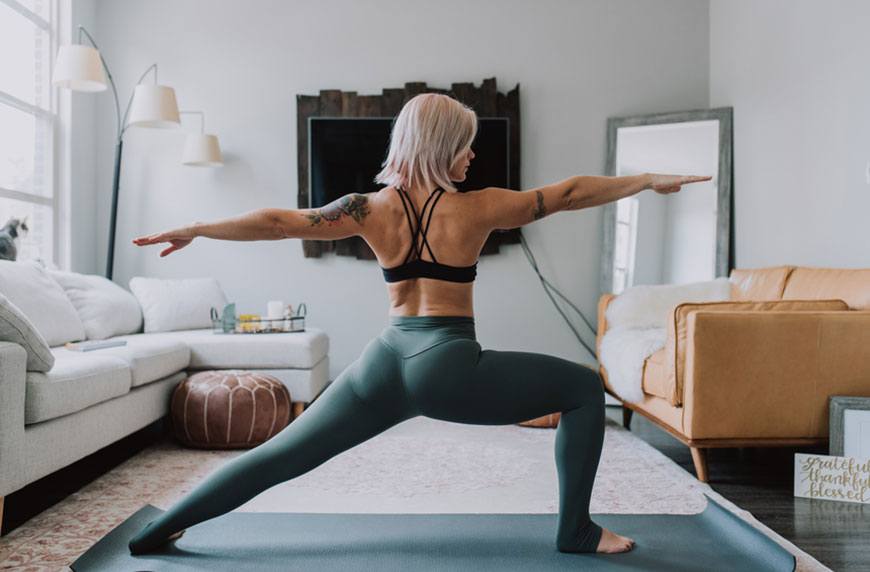
3. Warrior 2
How to do it: Toe-heel your right foot over a few inches so that the heel of your front foot and arch of your back foot are aligned as you open your torso. Elevate your arms parallel to the ground and extending away from each other. Keep your front leg at a 90-degree angle. Hold for 1–5 breaths.
The modifications
Reduce depth: Shorten your stance and bend your knee less, maintaining its positioning over the front ankle. This will alleviate some pressure from the front quad.
Change angle: Keep your hips at about a 45 degree angle between the side wall and the front wall, where your forward arm is pointing (as opposed to square the side wall, as prescribed). Then turn your ribcage to be square to the side wall. This will minimize tension in the pelvis.
Add a prop: Use a folding chair (or a chair with no arms) for extra support for your front leg.
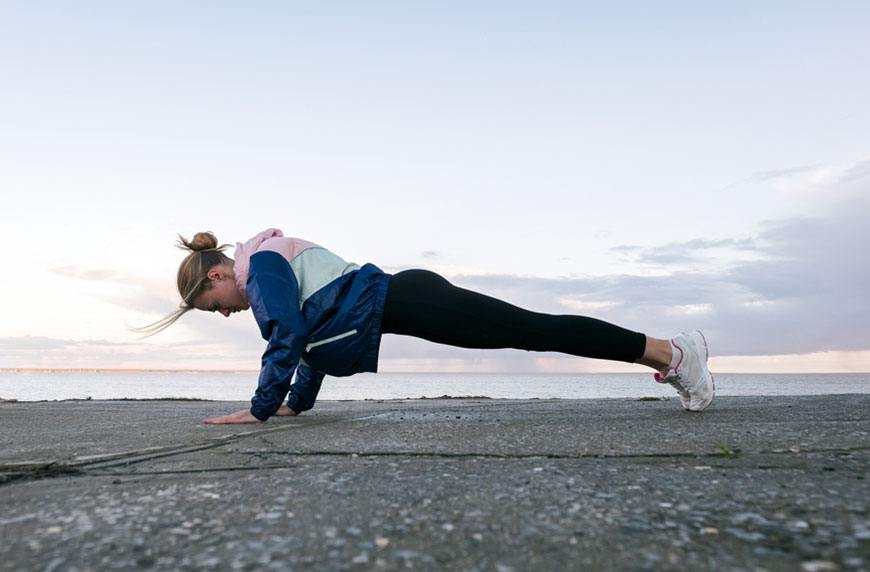
4. High-to-low plank (chaturanga dandasana)
How to do it: Start in a high plank with shoulders stacked over wrists. Focus on engaging your legs and core to keep your belly from hanging down towards the floor. Grounding down through the inner edges of your hand and externally rotating your upper arm bones so you feel your shoulder blades press into your back, lower down to a low plank. Keep your elbows tucked in close to the sidebody. At the bottom of the position, the angle of your elbow should be at 90 degrees. Hold for 2 breaths.
The modifications
Reduce depth: Stay in high plank or drop to your knees before you shift forward, then bend your elbows. This will lessen the amount of weight that is being moved, and take some pressure off the wrists.
Change angle: Turn your hands slightly away from midline. This will aid in keeping your upper arms adducted and drawn toward your ribcage.
Add a prop: Put a block on the high setting under your breastbone or one block on the high setting under each shoulder. This will ensure you keep your shoulders in the same plane as your elbows.
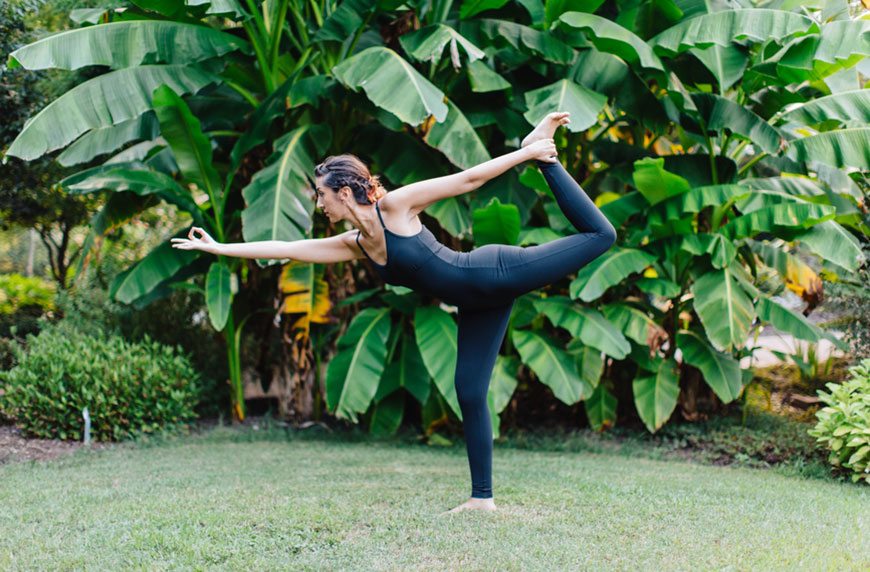
5. Dancer (natarajasana)
How to do it: Stand tall with both feet together. From there, start to bend the right knee while bringing the right heel toward your butt. Grab for your right outer ankle with your right hand and begin to lift your right foot toward the ceiling. At the same time, reach your left arm forward and up toward the ceiling. As you balance on your left foot, actively press down into the floor with your entire foot as you start to open your chest and press your lifted leg back and up. Keep the torso upright and actively press the tailbone down toward the floor. Hold on one side for 5 to 10 breaths, and then switch sides.
The modifications
Reduce depth: Stay vertical with your spine and focusing on one thing at a time, like kicking your heel away from your glutes.
Change angle: Draw your torso down parallel to the floor (more like standing bow) and use your back arm to lift your leg higher.
Add a prop: Grab yoga strap to make kicking up that leg more accessible. Begin by making a very large loop, then hook your foot. As time and your practice progresses, you’ll be able to find more height in your rear leg.
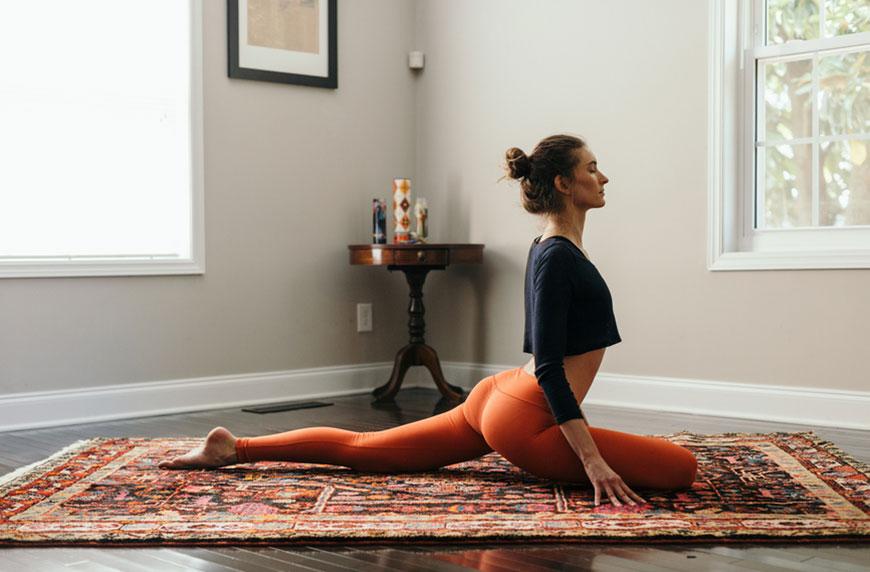
6. Pigeon (kapotasana)
How to do it: Bring your right shin parallel to the top of your mat, keeping your foot flexed. Extend your left leg straight behind you, top of foot resting on the floor. Stay upright for 3 breaths. Then, fold over and rest your head on the ground with your arms extended in front of you for 5–10 breaths. Switch legs.
The modifications
Reduce depth: Rather than forward folding, stay upright and allow the stretch to deepen in your hip flexor of your extended leg and the glute muscles of your folded one.
Change angle: If it's too intense to bring your front leg to a fully parallel position, bring your heel closer to your body. Just make sure to keep your foot flexed to protect your knee.
Add a prop: Those with tight hips can roll up a blanket or grab a block to place under the glute of your front leg. You can also rest your forehead on a block at a low, medium, or high setting in your forward fold to reduce the tension.
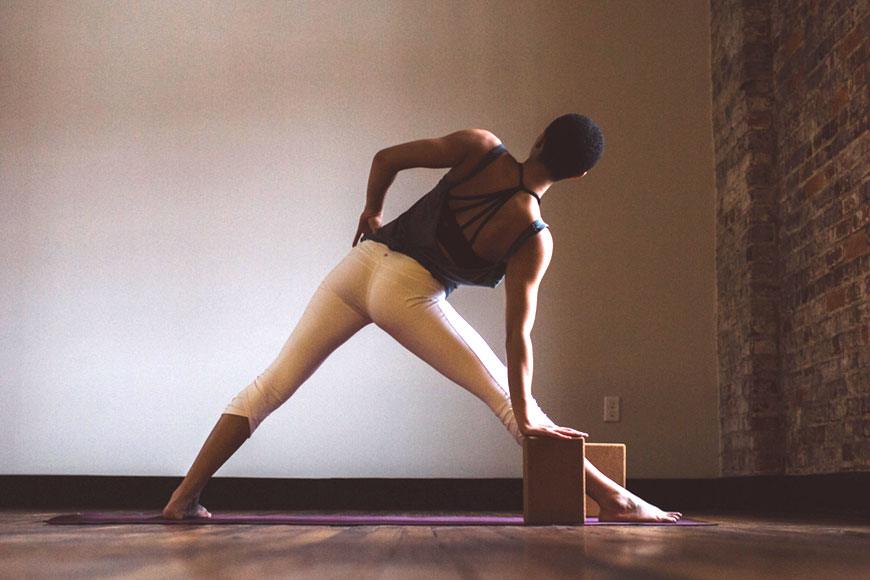
7. Triangle (trikonasana)
How to do it: Start in warrior 2. Straighten your front leg and begin to reach forward through your front fingertips, while simultaneously shifting your hips backward so they're more over your back leg than between the two, keeping both legs straight but not hyper-extended. Tilt forward until you can place your front hand on the floor next to the outside of your front foot. Use that tension to twist your torso toward the ceiling, lifting your heart. Look over your top shoulder and extend the fingers of your top arm toward the ceiling. Hold for 5–10 breaths, then switch sides.
The modifications
Reduce depth: Rather than rest your front hand on the floor, place it on your shin instead.
Change angle: To reduce the tension of this pose in the lower body, step your back foot closer to your front leg, but maintain the turnout in your hips.
Add a prop: Place a block next to your front foot, on a low, medium, or high setting, to bring the floor closer. Place your top hand on your hip instead of extended to the sky.
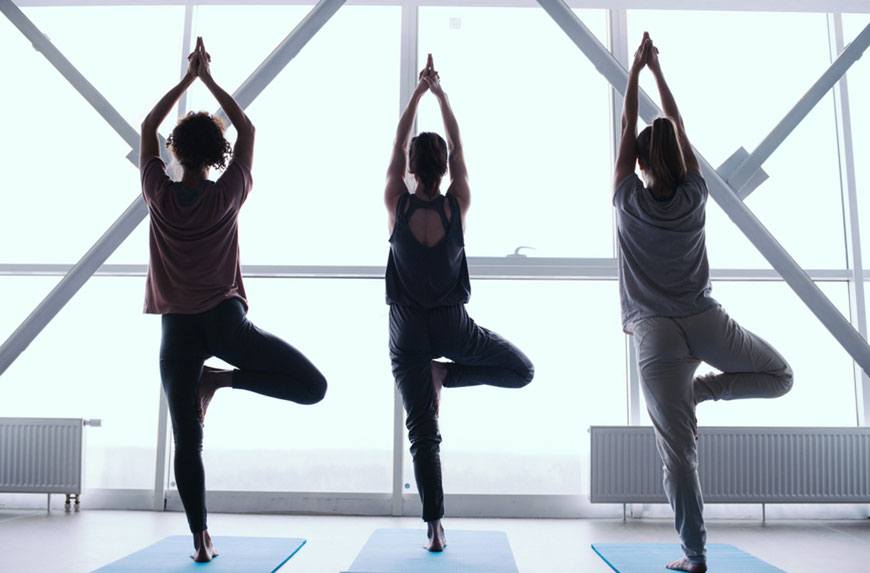
8. Tree (vriksasana)
How to do it: Start in mountain pose. Bring your right foot to the inner thigh of your left leg, pushing one into the other to create constant tension. The knee of your right leg should be turned out and facing down toward the ground at a 45-degree angle. Once you've found your balance, lift your arms overhead, keeping your gaze focused on a fixed point in front of you. Hold for 5–10 breaths, then switch sides.
The modifications
Reduce depth: Keep your hands folded in prayer at your heart center.
Change angle: Slide your foot lower on your standing leg (just never at your knee). Try placing it against your shin, or even gently against your ankle with your toes on the ground for support—leg still turned out.
Add a prop: Stand next to a wall and use it for balance by placing the palm of one of your extended arms on it.
9. Half moon (ardha chandrasana)
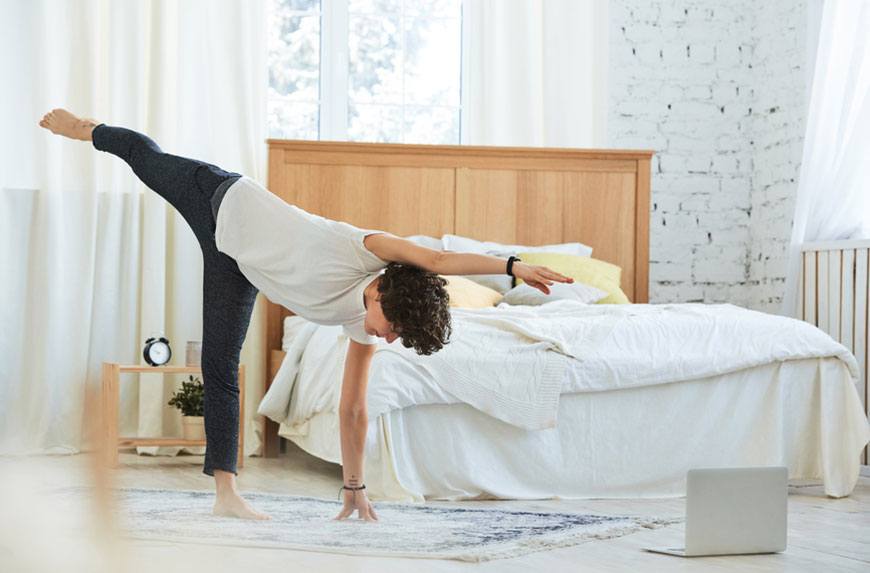
How to do it: From warrior 2, gently pitch forward until your weight is in your front leg (which should now be straight) and the palm of your front hand is resting on the ground a foot or two in front of you. With energy extending through the heel, raise your back leg until it's at hip height, keeping your hips stacked on top of each other and torso facing the wall next to you. Lift your back arm toward the sky (making a T shape with your arms) and look at the fingers of your raised hand. Hold for 5 breaths and repeat on the other side.
The modifications
Reduce depth: Rather than lift your gaze toward the ceiling, keep your eyes focused on the floor three feet in front of you.
Change angle: Leave your top hand on your hip instead of extended toward the sky.
Add a prop: Place a block on the low, medium, or high setting under your bottom hand to bring the floor closer.
10. Seated forward bend (paschimottanasana)
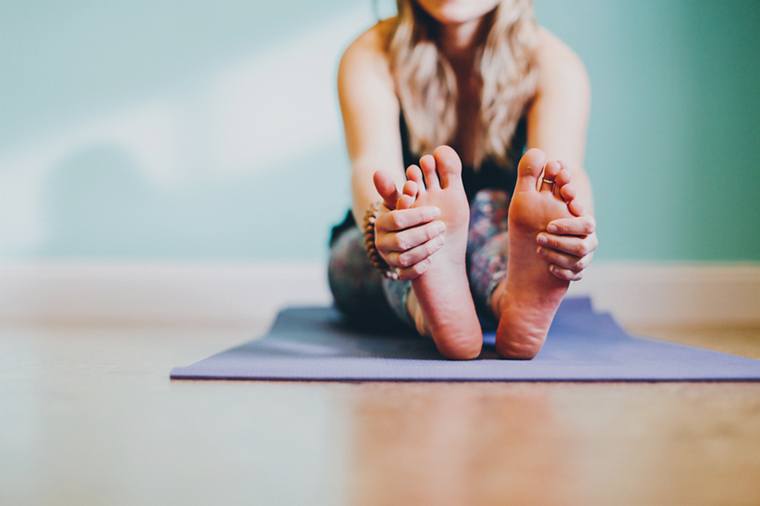
How to do it: Start seated on the floor with your legs extended in front of you and parallel, feet flexed. Sit up tall on your sitz bones, with a straight back and energy extending out of the crown of your head. Lift your arms toward the ceiling, palms facing each other. Start to hinge at the hips with a flat back, and lower your upper body over your lower body. When available, grab onto the outside of each foot with your hand. Release your neck and let your head hang heavy. Stay there for 5–10 breaths.
The modifications
Reduce depth: Bend your knees slightly you release tension on your hamstrings and make your feet more accessible to reach.
Change angle: If you can't reach your feet grab onto another part of your legs like your ankle or shins.
Add a prop: Place a yoga strap, belt, or towel around your feet and hold onto it instead as you deepen your stretch.
Something else all new yogis need to know about: yoga butt. Plus, these are the most-common mistakes people make on their mats and how to fix them.
Loading More Posts...