Our editors independently select these products. Making a purchase through our links may earn Well+Good a commission
A good at-home manicure is hard enough to conquer, but attempting nail art by yourself takes the task to a whole different level. If you don’t feel like your true self without a small masterpiece painted onto your fingertips (like moi), there’s a high chance that staring down at your at-home manicure is a big. fat. bummer. That’s why we’ve tapped professional nail artists for easy, replicable at-home nail art.
While your own nail art won’t exactly be Picasso-level, with fully detailed butterflies or flower prints, you can accent your manicure with minimalist and entry-level designs. “I would say that the best types of hand-painted nail art to do at home are simple abstract designs and natural patterns like leopard,” says Fleury Rose, a New York City-based nail artist. “This is because they’re more forgiving than doing precise straight lines or geometric patterns.”
There are plenty of household items that double as nail art tools, too, which makes your transition to being your own manicurist a lot easier. To set yourself up with a palette of nail polish paint to play with, Rose recommends using an old takeout container or tin foil to pour some enamel onto. “For dots, you can use a bobby pin or a sewing pin with a plastic ball. For ombre and spray paint effects, a makeup sponge or dish sponge will do the trick,” she says. And if you have any precise art or makeup brushes that you don’t mind using for your manis, those work too.
Now for the fun part—keep scrolling for the cutest DIY nail art designs that you can totally do by yourself with a little concentration and practice.
Confetti
One of the most foolproof nail art secrets: Throw some confetti on your nails with a sparkly, glittery coat of polish, a technique that nail guru Jin Soon Choi likes to do. This transforms a plain-color manicure into a party. Mix up your base coat colors for more of a rainbow pop.
How to do it: After applying a base coat and two coats of whatever color you’d like, grab a confetti polish like the JinSoon Dotty ($18) and swipe on as many layers as you want. Seal it with a top coat and voila.
Clouds
Rose swears that this cute cloud design is simple to copy—all you’ll need is a makeup sponge and a bobby pin. The good news is that clouds are relatively hard to do incorrectly, because they can basically be any imperfect shape that you plop onto your nails.
How to do it: Apply your base coat and two coats of whatever shade of sky blue that you wish. Use your sponge to dab a darker color to the top half of your nails, all the way to the tip. Then take your bobby pin, dip it into a white nail polish, and slowly, carefully dot it onto your nail, creating a cloud shape. Repeat and draw as many clouds as you’re into.
Ombre
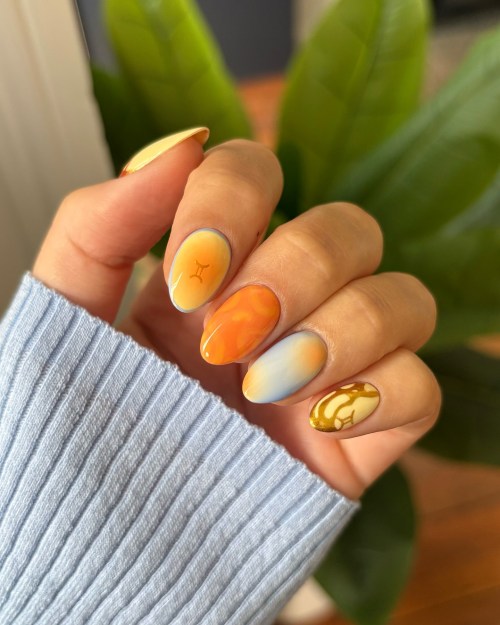
Ombre is a really cute way to layer on shade variations of your fave nail polish colors. Grab three hues of the same color family—Rose demonstrates with a sunset-orange variety—and a sponge to create the gradual fading from dark to light, which results in a chic upgrade on a single color.
How to do it: Paint two coats of your lightest color as your base, and give it about 10 minutes to dry. Dab on the second color with a sponge, moving up from the tip towards the cuticle. Finish with the third color—applied with a sponge—and only patting onto the tip of your nail, before swiping on a top coat to seal it in.
Leopard spots
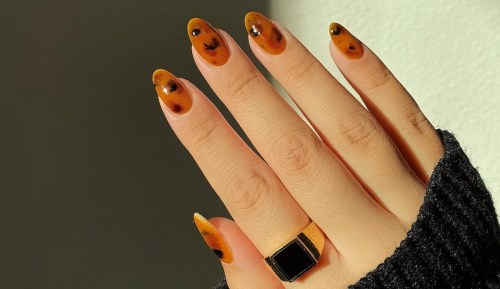
Yes, this one can look intimidating—but Rose promises that leopard print is something you can draw onto your nails with a little practice. Like clouds, leopard print is pretty uneven, so you don’t have to make perfect spots in order for it to look animal print-chic.
How to do it: Get a base of a neutral-colored nail polish down. Then grab a tiny brush (or your nail polish brush) to paint small base spots in oval and heart shapes. With another really small brush (or bobby pin or toothpick), partially outline the spots in a darker hue (like black).
Tiger print
Another animal print that’s on the easier side? Tiger stripes. The secret is all in the tiny brush that you use to draw stripes with. To make it look more realistic, Rose pairs a tiger orange with a more neutral safari brown on the edges of the nail.
How to do it: Paint your nails as you normally would, with your base layer being a tan hue. Take a sponge to dab the tiger orange into the middle of the nail, blending it on the edges so that it fades out to tan on the sides. Then take your skinny brush or tip to slide thin tiger stripes horizontally across your nails.
Polka dots
Celebrity nail artist and brand founder Deborah Lippmann‘s go-to design? “Polka dots is the easiest nail art to do,” she says. “I love polishing each nail a different shade. It’s so colorful, so happy, and so easy.”
How to do it: Lippmann recommends shuffling 10 colors of nail polish, and choosing a different shade to create the polka dots on each nail. Polish each nail with two layers and let dry for two minutes. Then take your brush out of the bottle, wipe most of the polish off, and literally dot different shades onto each nail.
Sign Up for Our Daily Newsletter
Get all the latest in wellness, trends, food, fitness, beauty, and more delivered right to your inbox.
Got it, you've been added to our email list.
