Adding running to your fitness routine can result in plenty of health perks. Not only does hitting the pavement play a role in lowering the risk of Alzheimer’s disease and dementia, but it also releases neurochemicals in your brain that boost your mood and increase your self-confidence, among other things. Unfortunately, sometimes all that running can come at a cost, and you might feel your knees hurt after running. Knee pain after and while running can occur due to factors such as improper technique, tight muscles, not warming up properly, and even wearing the wrong shoes. Good news, though: The pain doesn’t have to keep you from lacing up those sneakers for good.
Runner’s knee—or, in more scientific terms, chondromalacia patella—can occur when the cartilage under the kneecap is damaged. It’s one of the most common injuries runners face due to that cartilage being a natural shock absorber.
According to Becs Gentry, a Peloton Tread instructor, and Nike Run ambassador, there are a few different reasons those symptoms—aka kneecap pain, swelling, or feelings of popping or grinding—ever even surface in the first place.
But runner’s knee is also a “catchall” term for any knee pain runner’s may be experiencing, and it doesn’t necessarily have to do with damaged cartilage, says doctor of physical therapy Kelly Starrett, an author, professional athlete coach, mobility expert, and founder of The Ready State. Instead, Starrett says to think about knee pain as your body’s way of signaling a “request for change” in some aspect of your training, mobility, and readiness.
What causes runner’s knee?
Unfortunately, it may be hard to pin down the exact cause, because knee pain is a signal that your body’s overall readiness for running is out of whack.
All of those factors can cause a lack of mobility in your hip flexors, tight muscles and tendons, sensitive muscle tissue, and congestion in the connectivity between your muscles. Those physical symptoms can cause pain all the way down to your knee—especially in runners that tend to have tight quads, which are connected to the knee (along with the calves and hamstrings). When you’re experiencing tightness and a limited range of motion, your body sends a signal to your brain that your knee might be in danger, which we interpret as pain.
“Areas of that muscular system can absolutely refer pain down to the knee,” Starrett says.
Other common causes of knee pain while running
Other common knee-pain-causing issues Gentry sees come from eating a poor diet that builds up toxins and can contribute to inflammation, wearing shoes that don’t provide enough support, and not having enough recovery time. “It’s important to allow the body to rest, adapt, and recover prior to the next run,” she says. “Massage and Epsom salt baths are something I always suggest when runners have muscular soreness, as they can both help reduce the recovery time and soothe the body.”
As exciting as it can be to start a new training program or modality, you should always scale back to begin with in order to give your body time to get acclimated to your training. “You might experience runner’s knee from increasing your mileage too soon, since going from zero miles to countless miles in a short time span can cause pain and aggravation to the body,” says Gentry.
To circumvent this, start off modest. And if you aren’t sure what that looks like, consider enlisting the help of a professional run coach or using an app that has running plans such as the Nike Run Club app.
Your technique needs improvement
Another reason you may be experiencing knee pain while running is poor technique, says Gentry. It happens to the best of us, especially as we fatigue, but it’s definitely something you should be actively thinking about on your runs.
Make sure that your hips aren’t shifted backward, your head is in a neutral position, your shoulders are relaxed, your chest is open, and that you’re swinging your arms forward and backward. You’ll also want to avoid butt-kicking as this can cause unnecessary stress on muscle groups like your hamstrings, which as a result can pull on other muscles and aggravate your knees. Additionally, you should try to strike the ground with your mid-foot, and making sure that you’re not running with your knees locked out.
4 ways to prevent running from hurting your knees
While getting rid of the pain is great, there are also some ways to prevent your knees from hurting in the first place. Starrett describes this as “changing the inputs so that the local tissue physiology is improved and the brain recognizes that these positions are safe.”
advertisement
1. Practice Isometric exercises
“The first order of businesses that try to see if we can signal to the, the brain that these positions of the knee in movement are safe,” Starrett says. “The easiest way to do that is to get someone to do some isometrics, which are muscle contractions without movement.” The idea is that if you mimic the movements of running for an extended period of time, your brain will learn that those are “safe” positions to be in, and so pain signals won’t fire in the future. It will also help you attain your full range of motion, which should help with knee pain.
“It gets us very comfortable in those positions, ends up restoring our native range,” Starrett says.
Starrett recommends knee pain moves like doing lunges, and eventually progressing to raised leg lunges, while breathing deep, flexing your glutes, and holding the position.
“Get yourself into a big lunge position with the feet pointed straight, both feet pointed straight ahead, all the toes on the ground,” Starrett says. “You’re gonna lower yourself down until you feel a pull in your back leg. But more importantly, until you can still squeeze your glute on the back leg. Hold that for five to 10 big breaths, because if you can’t breathe in a position, you don’t own that position. And running is about moving from position to position while breathing hard.”
2. Practice soft tissue mobilization (foam rolling)
Tightness in your soft tissue could be causing pain in your knees, so you’ll want to foam roll (especially on your quads), focusing on areas where you feel pain when they’re compressed by the foam roller or pressure point ball.
3. Train with a running coach
People think running is one of those things you just go out and do, but learning how to run correctly from the get-go can help keep your knees healthy for years to come. “If you’re unsure about correct running technique, find a coach who can help you analyze your running style and work with you to make it stronger,” Gentry says.
advertisement
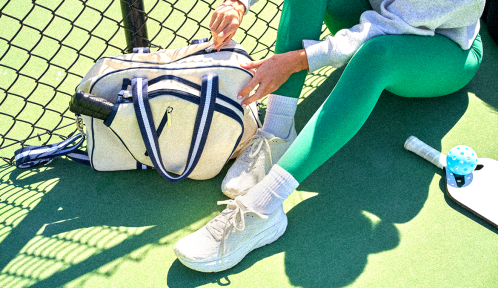
4. Invest in a good pair of running shoes and socks
You wouldn’t show up to swim practice without a quality bathing suit, right? Well, the same goes for running: You need trustworthy gear to get the job done. “The technology in sneakers today is very advanced, and most running shoes are designed to assist the human body, so it’s a great idea to head to a running store for a gait analysis,” says Gentry. “In most cases, they’ll be able to show you shoes that suit your natural running style. Definitely remember to wear shoes that are comfortable, though.”
5. Keep a training diary
To make sure you’re not overdoing things—especially at the beginning of your running journey—take the time to keep track of your sessions. “Starting a training diary will help you clearly see and outline which days you dedicate to running, training, and to recovery,” Gentry says. “This way, you’ll be able to balance yourself out and not do too much, too soon.”
6. Build your muscle strength
Adding some strength training into the mix as well can do wonders for protecting your body—and turning you into a better runner. “Building your muscular strength is so important. Around every joint, there are muscles, tendons, and ligaments. Runners need to ensure that their whole body is looked after and strengthened for running, given the impact it has on the body,” Gentry says. “Using bodyweight or weighted exercises and focusing on single-leg strength—as well as double-leg strength—will help build your power and hopefully keep knee injuries at bay.”
We know running with knee pain isn’t ideal, but if you make sure you’re wearing the right gear, you’re focusing on your form and getting in cross-training sessions (strength training is your BFF), recovering, and eating foods to fuel you, it should be gone in no time! And never underestimate the power of ice cup massages and Epsom salt baths.
Is it ok to keep running with runner’s knee?
Try practicing the techniques above, with an emphasis on isometric exercises and soft tissue mobilization. If that doesn’t relieve the pain, you should see a doctor.
advertisement
Does runner’s knee go away?
If you allow yourself to recover properly from the exertion of running, and you practice isometric exercises and soft tissue mobilization, runner’s knee should go away. If it doesn’t, you should consult with your physician.
Sign Up for Our Daily Newsletter
Get all the latest in wellness, trends, food, fitness, beauty, and more delivered right to your inbox.
When it comes to building strong, sculpted glutes, most of us focus on big moves like squats and deadlifts. But if you want to truly level up your lower-body strength (and get that lifted, rounded shape), it’s time to give your upper glutes some serious attention.
exercise physiologist and part-time teaching faculty at the University of Georgia
advertisement
“This area is often ignored,” says Holly Roser, CPT, a certified personal trainer and owner of Holly Roser Fitness. And that really is a shame. The upper glutes—specifically, the gluteus medius and gluteus minimus—are the secret weapons behind hip stability, posture, and lower-back support.
Strengthening them doesn’t just help with aesthetics; it also boosts athletic performance, prevents injury, and improves overall mobility. Whether you’re an avid lifter, a runner, or just looking to move pain-free, targeting this area can make all the difference. (NOt to mention that ignoring it could lead to a glute imbalance.)
So how do you engage these often-overlooked muscles? It’s all about strategic activation and mind-muscle connection. We asked top trainers for the most effective upper-glute exercises that actually work, from banded hip abductions to single-leg deadlifts. Ready to fire up those glutes and feel the difference?
Keep reading for a science-backed upper butt workout that will leave you stronger, more balanced, and yes—perkier.
First things first: A refresher on upper glute anatomy
When exploring any glute-focused exercises and charting out glute goals, it helps to understand our glute anatomy.
Your glutes are comprised of the gluteus maximus, the gluteus medius, the gluteus minimus, and the piriformis, according to ACE certified health coach and personal trainer Araceli De Leon, MS.
Where your gluteus maximus is the largest and most superficial of the glute muscles (meaning that it’s the outermost layer), your gluteus minimus is the deepest glute muscle, located underneath the gluteus maximus and gluteus medius, De Leon says.
Meanwhile, the gluteus medius is what we know to be the upper glutes.
“The gluteus medius is responsible for abduction or lateral raise and rotation of the hip joint,” De Leon says. “However, the gluteus maximus is so large relative to the others that it is also part of the upper glutes.”
From an appearance perspective, certified personal trainer Amy Schemper, CPT adds that the gluteus medius is “responsible for the ‘glute shelf’ look” that many desire.
What are the benefits of upper glute exercises?
When you do upper glute exercises, whether they’re standing or seated, Roser says you’ll experience numerous benefits—not just in the way you feel, but also when it comes to your athletic abilities.
advertisement
“You’ll reduce lower back pain, knee pain, and the risk of ankle sprains, as this important muscle is a strong stabilizer,” she says. “You’ll also notice you’ll have a faster running speed and be able to increase the resistance used in your workouts.”
The reason? Stronger upper glutes lead to more overall bodily stability.
“Besides keeping our hips level and stable, our upper glutes have a very important job in our overall biomechanics, stability, and balance,” says Nashville-based certified personal trainer Bianca Vesco, CPT. “When we walk and or run, our upper glutes aid in stabilizing our pelvis. They also play a critical role in maintaining an efficient and safe lower body.”
There’s also another benefit: You’ll notice a more lifted and pronounced booty, Roser says. So if you’ve ever wondered why your bum is flat at the top, it’s because you need to incorporate upper glute exercises into your routine.
The ideal reps and sets to build your upper glutes
Before diving in, take a moment to consider your upper glute goals. Do you want to strengthen, stabilize, or maintain or build a shelf? You’ll want to tailor your routine to fit your fitness dreams, according to Vesco.
“Are you trying to build muscle mass and strength by lifting heavy weights?” she asks. “Are you correcting an imbalance or rehabbing an injury with a resistance band?” In either scenario, you can expect upper glute benefits. The way you go about them just differs.
Here’s what we mean: The number of reps and sets you perform is dependent on your glute goals, as is the amount of time you take to rest between each.
“If you are aiming for muscle hypertrophy and added mass, aim for heavier weights for lower rep ranges—four to eight repetitions—for three to five sets during your larger compound movements such as squats, lunges, deadlifts, and hip thrusts,” Schemper says. “If muscular endurance is your goal, find a weight you can maintain for 12 to 20 repetitions for three to four sets for larger movements and an elastic mini band around knees or ankles for 15 to 20 repetitions on smaller movements.”
Meanwhile, if you’re exploring upper glute exercises to correct a muscle imbalance or rehab an injury, Schemper says to start slowly with low weights, resistance, and reps, and gradually increase as you feel stronger.
No matter which approach you take, you want to feel challenged.
advertisement
“At the end of the day, you want to be progressively overloading the glute muscles to see change,” Schemper says. “If something feels too easy, it’s probably time to increase your weights, resistance, reps, or sets—or all of the above. If you’re fatiguing quickly or not able to finish sets or reps, it’s time to take it down a bit.”
“Besides keeping our hips level and stable, our upper glutes have a very important job in our overall biomechanics, stability, and balance. When we walk and or run, our upper glutes aid in stabilizing our pelvis. They also play a critical role in maintaining an efficient and safe lower body.” —Bianca Vesco, CPT
The best upper glute exercises to add to your routine
So, how do you work the top of your glutes? According to Schemper, the key to building upper glutes is to focus on hip abduction (moving away from the center of the body).
“However, remember no muscle works in isolation, so while smaller isolated movements help target the upper glutes, it’s important to work the lower body with larger compound moves like squats, deadlifts, and lunges,” she reminds us.
Although you can work your glutes by walking, running, and other everyday functional movements, there are some exercises that can really boost booty gains. Here are nine upper glute exercises that are sure to make your buns burn.
1. Clam shell
1.
Lie on your left side with your knees bent at 90 degrees, stacked on top of each other.
2.
Lean your head on your left arm to support your neck and place your right hand in front of you for support.
3.
Keep your feet together and lift your top knee as high as possible without rotating your pelvis.
4.
Hold for a moment, then lower your knee back to the starting position.
5.
4. Do 2 sets of 25 reps, then switch sides.
2. Curtsy lunge
1.
Stand with your feet hip-width apart and your arms clasped in front of your chest.
2.
Step back with your right leg, crossing it behind your left leg in a curtsy position.
3.
Bend both knees until your front leg is parallel to the floor (or as close to parallel as you can comfortably go).
4.
Keep your hips and shoulders straight ahead throughout the motion with your torso upright.
5.
Push through your left leg to return to standing.
6.
Repeat for 3 sets of 15 reps on each side.
3. Sumo squat
1.
Stand with your feet wider than your shoulders with your shoulders, back, and core engaged. Turn your toes out 45 degrees and clasp your hands in front of your chest.
2.
Bend your knees as you push your hips back to lower toward the floor. Let your knees track diagonally out toward the direction of your toes as you lower.
3.
Lower down until your thighs are parallel with the floor (or as far as you can comfortably go).
4.
Pause for a moment, then return back to standing.
5.
Do 3 sets of 12 to 15 reps.
advertisement
4. Lateral lunge
Stand with your feet at hip-width distance, toes facing forward. Clasp your hands in front of your chest.
Shift your weight to the right and step to your right with your right foot.
With a flat back, bend your right knee and shift your hips back, keeping your left leg straight.
Keep your toes pointed forward on both feet.
Press into your right heel to return to standing.
Do 12 to 15 reps, then repeat on the right side—or go back and forth between sides.
5. Banded lateral walk
1.
Place a mini band or looped resistance band around your thighs at a tension that’s comfortably challenging.
2.
Stand with your feet hip-width apart and your hands clasped in front of your chest.
3.
Bend your knees as you push your hips back to lower toward the floor into a squat position as if you were sitting in a chair.
4.
Step your right foot to the side in line with your other foot. Step together and repeat.
5.
Do 3 sets of 15 reps in each direction.
6. Dumbbell front squat
1.
Stand with your feet hip-width apart (or a little wider) with your shoulders, back, and core engaged. Hold a dumbbell in each hand (palms facing in toward your body) with your arms at your sides.
2.
Bend your elbows to lift the dumbbells up high on your shoulders in a racked position with your elbows slightly in front of your shoulders.
3.
Bend your knees as you push your hips back to lower toward the floor into a squat position as if you were sitting in a chair.
4.
Lower down until your thighs are parallel with the floor (or as far as you can comfortably go).
5.
Pause for a moment, then return back to standing.
6.
Do 3 sets of 12 to 15 reps.
7. Sumo deadlift
1.
Stand with your feet wider than your shoulders with your shoulders, back, and core engaged. Turn your toes out 45 degrees.
2.
Place a dumbbell on the floor vertically between your legs.
3.
With a flat back and braced core, hinge at your hips and bend your knees to grasp the head of the dumbbell.
4.
Drive your feet into the ground and straighten your legs to slowly come up to standing, activating your glutes in the process. Keep your arms straight the entire time.
5.
Slowly lower yourself back down.
6.
Do 3 sets of 15 reps.
8. Single-leg Romanian deadlift
1.
Stand with your feet hip-width apart. Tuck your right elbow into your right side as if you were running. Extend your left arm by your side.
2.
Drive your left knee up to hip height so your left thigh is parallel to the floor. You should be balancing on your right leg.
3.
Engage your core and simultaneously lean forward, extending your left leg behind you. Press your right foot into the floor while doing so, and keep your right leg slightly bent.
4.
At the same time, lower your right arm down by your side and tuck your left elbow into your left side as if you were running.
5.
Continue lowering until your torso is parallel to the floor or you feel a pull in your right hamstrings (whichever comes first).
6.
Press into your right foot, squeeze your glutes and reverse the movement to return back to the standing start position.
7.
Do 10-12 reps on one leg before switching sides.
9. Side hip abduction
1.
Lie on your left side with your legs extended and your feet stacked on top of each other.
2.
Lean your head on your left arm to support your neck and place your right hand in front of you for support.
3.
Keeping your legs straight and squeezing your glutes, lift your top leg to around shoulder height without rotating your hips.
4.
Pause, then slowly lower your top leg back down to starting position.
5.
Do 2 sets of 25 reps on each leg.
advertisement
TIP
If you’re having a hard time keeping your legs from coming forward, you can lean against a wall and have your top leg slide to correct any slanting of your body that might occur.
10. Banded standing hip abduction
1.
Stand with a resistance band around your ankles, feet hip-width apart, knees straight but not locked.
2.
Keeping your legs straight and squeezing your glutes, shift weight to one leg and lift the other leg out to the side without rotating your hips.
3.
Pause, then slowly lower back down to starting position.
4.
Do 12-15 reps per leg.
11. Fire hydrants
1.
Start on all fours with your hands and knees on the floor. Align your elbows and shoulders over your wrists and your hips over your knees
2.
Lift one knee out to the side, keeping it bent at 90 degrees.
3.
Avoid rotating your hips—keep the movement controlled.
4.
Lower back down and repeat.
5.
Do 2 sets of 20 reps on each leg.
12. Bulgarian split squat
1.
Stand a few feet in front of a bench, box or chair, facing away from it. Clasp your hands in front of your chest. (Increase the challenge by placing a barbell or dumbbell on your hips.)
2.
Reach your left foot back and place the top of your left foot flat on the surface. You may need to hop your right foot forward so you can do a proper lunge.
3.
Lean your torso forward slightly and bend your front knee to sink your hips toward the floor as low as you can comfortably go.
4.
Your front-leg shin should be vertical or close to it, while your back knee should point down toward the floor. If either leg is out of place, move your front foot forward or backward until you’ve found the ideal positioning.
5.
Push through your front foot to return to standing.
6.
Repeat for 10-12 reps, then switch sides and repeat.
13. Step-up
1.
You’ll need a bench or box to complete this exercise.
2.
Stand in front of your bench and place your left foot on the bench, so that your left knee is bent round 90 degrees.
3.
Keeping your torso upright, press your weight into your left foot and push through your quads and glutes to straighten your left leg and stand on top of the bench.
4.
Reverse the move, lowering your right foot to the floor with control.
5.
Do 10-15 reps, then switch sides and repeat.
14. Single-leg glutes bridge
1.
Lie on your back with your arms by your sides, knees bent and feet flat on the floor hip-width apart. Your feet should be close enough to your hips that if you reach one hand at a time toward each heel, you could just touch it with your fingers.
2.
Extend your right leg straight on the floor.
3.
Tuck your tailbone slightly. Squeeze your glutes and core, then press your left heel into the floor to drive your hips up toward the ceiling until you form a diagonal line from knees to hips to chest.
4.
Squeeze your glutes at the top of the exercise and pause for a moment. Then slowly return your hips to the floor.
5.
Do 10-12 then switch legs and repeat.
advertisement
15. Hip thrust
1.
Sit on the floor with your mid back against the edge of a bench, box, couch, or wide chair. Clasp your hands in front of your chest. (Increase the challenge by placing a barbell or dumbbell on your hips.)
2.
Place your feet on the floor about hip-width apart. Your feet can be slightly turned out, depending on what feels most comfortable for you.
3.
Squeeze your glutes and push through your heels to raise your hips up toward the ceiling. Keep your back flat and head pointed toward the wall in front of you.
4.
Lock your hips out at the top of the movement by fully extending your hips and squeezing your glutes. Your shins should be vertical, knees neutral or slightly externally rotated and legs forming 90-degree angles.
5.
Pause, then slowly lower your hips to the floor.
6.
Do 2 sets of 12-15 reps.
16. Single-leg hip thrust
1.
Sit on the floor with your mid back against the edge of a bench, box, couch, or wide chair. Clasp your hands in front of your chest.
2.
Lift your right leg off the ground, and push through the heel of your left foot while you push your hips up to the ceiling by squeezing your glutes.
3.
Pause, then slowly your hips back towards the floor.
4.
Do 2 sets of 25 reps per side.
What not to do: Habits that could weaken your glutes
If you regularly do many of these exercises but don’t seem to be noticing any change in the look or feel of your upper glutes, you may be engaging in other behaviors that’s voiding out your hard work.
“You may not be lifting heavy enough, eating enough for your energy expenditure, or you may need more variety in your glute workouts,” Schemper says. “The key to engaging your glute muscles for growth and strength is to make sure you’re actually utilizing the right muscles. In traditional movements like squats or lunges, our quadriceps muscles are our primary movers and tend to do most of the work. To turn on the glute muscles, be sure to get low into the movement and push through the heels as you contract.”
It’s important to also be mindful of your pelvis during all upper glute exercises, Schemper says.
“Many of us experience an anterior pelvic tilt (where our pelvis is tilted forward) which can affect our ability to activate our glute muscles during exercise,” she reveals. “Banded glute bridges and deep core exercises can help correct anterior pelvic tilt, as evidenced by this study1. With a stronger core and more neutral pelvic alignment, our glutes can better engage in lower-body movements.”
Frequently Asked Questions
How do I give my upper butt a natural curve?
Be consistent—and patient. “If you’re looking to build a stronger, more muscular butt, it’s going to take some time,” Vesco says. “You have to lift heavy with a plan, you have to eat more to fuel those lifts, you have to stay consistent in the gym, and you have to show yourself grace. Rome wasn’t built overnight and neither is a bigger booty!”
advertisement
How do I know if my upper glute workout is working?
Remember: Upper glute gains take time. You may feel like your hard work isn’t accounting for much, but Vesco reminds us that there are studies that suggest optimal glute growth can take between 18 months and two years to really witness.
“The work is never over and consistency always gives you the possibility to expedite that process,” she says. “However, training for life is a lifelong journey and taking care of your glutes and overall leg strength is a surefire way to make sure you’re still strong and able-bodied at 80 years old. Strong glutes, strong legs, strong life.”
Can you work out your glutes two days in a row?
TL;DR: It depends on your skill level and overall fitness.
“There are many aspects to consider when discussing exercise recovery, including training or exercise volume and frequency, adequate sleep, proper nutrition, training periodization, rest days, and more,” Rachelle Reed, PhD, an exercise physiologist, explains. “Recovery is an important part of a training program and aims to restore the body to homeostasis [a balanced state] and occurs during the time outside of an exercise training session.”
With that in mind, if you’re new to resistance training—and especially if you’re performing large muscle, multi-joint exercises like squats, lunges, deadlifts, and hip thrusts—a 24- to 48-hour rest period is ideal.
“Basically, monitor your perceived soreness levels,” Dr. Reed says. “DOMS—delayed onset muscle soreness—can start and last anywhere from 24 to 72 hours or more depending on a variety of factors. So, your best bet is to start slow and monitor how you feel. After a few sessions, you will understand how your body is reacting.”
Once you become more experienced with upper glute workouts, it’s totally fine to train back-to-back, according to Dr. Reed—though, she still recommends switching it up for the most noticeable gains.
“The most effective programs will mix different movement patterns, loading, and other techniques to progress efficiently and safely,” she says. “The main point to note while going for booty gain will be you are aiming for hypertrophy [increasing muscle size/volume] and adequate, but appropriate for your fitness level, loading will be highly important.”
How many times a week should I work out to grow a butt?
There’s no one set answer.
advertisement
“How often you should perform these exercises depends on how heavy you’re lifting for them,” Vesco says. “Heavy lifts for muscle growth and strength should only be done one to two times per week.”
Can you change the shape of your glutes through exercise?
Yes, but it will take time.
“Anyone can change the shape of their butt, but it depends on how drastic you want that change to be,” Vesco says. “We all have our own goals and standards but if your goal is to grow a bigger booty, you need to focus on the entire backside, not just the upper glutes. Building strength in the gluteus maximus, medius, and minimus will get you there much faster.”
Additionally, it’s important not to overwork your glutes in hopes of faster results.
“You definitely need to stimulate the muscles to help them grow, but training them too much can be counterproductive if you don’t give them time to rest, repair, and rebuild,” Vesco says.
What are the most useless exercises for building your glutes?
“Bicep curls!” Vesco jokes. “‘Building’ can mean a lot of things for a lot of people but if you want to actually increase the size of your backside, you have to lift heavy weights consistently.”
Why are my upper glutes not growing?
As hard as you may be working to grow your booty, you may simply be focusing on the wrong areas and glute exercises.
“If you aren’t seeing glute growth, you may be training mostly in the sagittal plane—think squats and lunges—train in the horizontal plane with banded side steps and side lunges, as well as the transverse plane with curtsy lunges, for better glute gains,” Schemper says.
It’s also possible to plateau while working out. In fact, it’s common. Your body can adapt to movements, weights, and workouts, according to De Leon. So if you’re doing all of these exercises but aren’t reaping any new rewards, she says it’s time to mix it up with more weight, reps, or new exercises altogether.
“Another example, if you’re using bands, try using cable machines; or if you’re using machines, try free weights such as barbells, dumbbells or kettlebells,” she says.
Sign Up for Our Daily Newsletter
Get all the latest in wellness, trends, food, fitness, beauty, and more delivered right to your inbox.