Our editors independently select these products. Making a purchase through our links may earn Well+Good a commission
There is an art to getting the perfect, effortlessly-touseled blowout. To get that look more easily, hairstylist Matthew Newman has the perfect four-step cheat. Because doing your own blowout is hard work—even for him.
Experts in This Article
Matthew Newman is a hairstylist in New York City.
“It’s hard because your arms are attached to your body,” says Newman. “Literally, you’d have to break your arms off to be able to recreate what we do in a salon for our clients. So, no shame in having a hard time getting your hair blow-dried at home. Honestly, I can’t even accomplish as good a result on myself as I can on a client.”
The key to getting the best DIY blowout is to break your hair into four sections—bottom, middle, top, and front pieces—and treat each section differently. Newman broke down these sections in a TikTok and shared even more details with us.
Before going in with any heat, make sure your hair is prepped.
“I always beg people to use a heat protector because it makes a difference,” says Newman. “But I really think the less product, the better for making a blow-dry shape.”
From here, use whatever tool works best for you. That can be a blow dryer (our editors—and most stylists—swear by the Dyson Supersonic) with a round brush or a blowdryer-brush combo like the Revlon One Step ($60). Read on for Newman’s blow-dry roadmap.
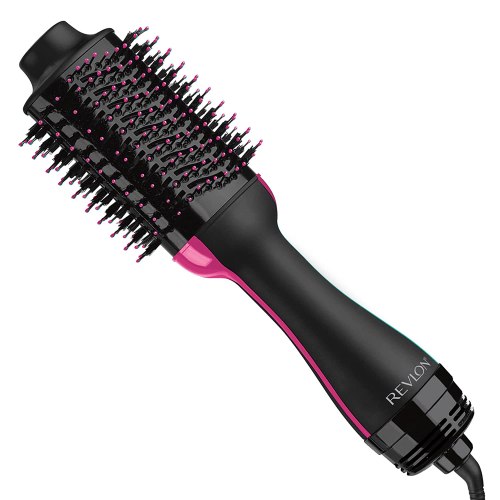
Revlon One-Step Volumizer Original 1.0 Hair Dryer and Hot Air Brush — $60.00
How to blow out your hair in 4 simple steps
1. Sleek out the bottom
You want the bottom layer to be super sleek—so think about using this step to maximize your length. “I like to do the nape of the neck straight with the little bend at the bottom,” says Newman. “That’s our longest layer because it’s at the bottom. So you want to maximize that length by not giving it curls because a curl, or twist, or bend, which will make it appear shorter.” Plus, the nape of the neck generates heat, so if you’ve got wavy, curly, or coily hair, “that area tends to curl back up as the days go on.”
2. Add a twist to the middle
This section comprises the bottom of the ear to the crown of the head, temple to temple. “That whole middle section, that’s where I like to do a good blow-dry curl where you use the blow dryer to smooth the section with a loose wave to it,” says Newman. Here, you can curl your hair away from your face or toward your face, depending on how you like it. “On myself, I do one side towards my face and one side away from my face. For one, it’s just easier ergonomically. But also, I don’t want both sides to be completely symmetrical. So when you do that, if you get more of an undone look.”
To prevent your hair from getting tangled in the brush, Newman says to move through slowly.
“You don’t want the hair strand to be fully wrapped around the brush from root to tip all at once; that is how you tend to get tangled,” he says. ‘If you start doing the shaping at the root and the ends are hanging off the brush, and then you slowly work down toward ends, you’re going to avoid tangling.”
3. Blow the top straight up and touch up to curl the ends
If someone else were styling your hair, they’d take the top sections straight up and curl the brush under to get a bit of curl on the end of the hair. But that’s nearly impossible to do on yourself. “When you’re going straight up, it’s hard to get a really good bounce on the end because it’s just like your arms have reached the sky,” says Newman. “So once your blow the hair straight up with the round brush to get good volume,” go in and split it wherever you part it and touch up the ends on each side with the rounding of the brush.”
4. Perfect your front pieces
“Not to be dramatic, but this is the most important part of the whole thing,” says Newman.
For those with any curl—from 4C coils to 2A waves—Newman says to start by getting your roots super smooth. “While the root is pulled as tight as possible, you need to have heat coming down, completely drying the one inch of hairline completely smooth,” he says.” If you have straight hair, you don’t need to focus on smoothing out your hairline—just go straight to the next step.
“You can then start blow drying over the brush, taking your hand more towards in front of your forehead,” says Newman, “and you’re going to do lots of that rounding, rounding, rounding with the brush.”
Oh hi! You look like someone who loves free workouts, discounts for cutting-edge wellness brands, and exclusive Well+Good content. Sign up for Well+, our online community of wellness insiders, and unlock your rewards instantly.
Sign up for the Well+Good SHOP Newsletter
Get exclusive deals on wellness, beauty, fitness, and food products that have been hand-picked by our editors.
Got it, you've been added to our email list.

