Our editors independently select these products. Making a purchase through our links may earn Well+Good a commission
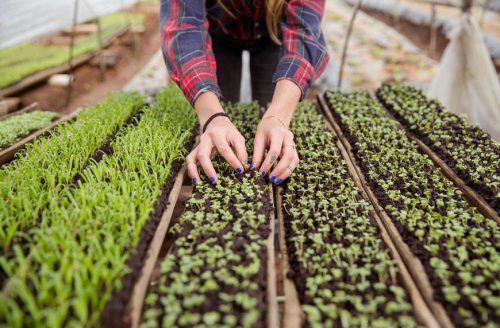
If you’ve always wanted to become a plant lady of the kitchen—the kind who casually plucks basil and rosemary leaves from her kitchen garden to make everything taste delicious and look homespun—here’s the perfect project to get you started. Microgreens are tiny, delicate plants that pack a strong nutritional punch of vitamins, antioxidants, and enzymes. And best of all, you can grow a crop from start to finish in a couple weeks.
Dubbed “vegetable confetti” because of their itty-bitty leaves, microgreens are also highly flavorful and aromatic, working well as colorful, nutrient-dense garnishes on everything from simple soups and sandwiches to gourmet meals.
These tiny but powerful plants are the ultimate trifecta of quick, easy, and inexpensive to harvest in your own home—or even your tiny apartment. And since they get top-dollar at the farmers’ market, your labor of veggie love could pay off financially as well.
So, what are microgreens exactly?
Think of them like vegetables and herbs that haven’t hit puberty yet, explains registered dietitian Leah Silberman, RDN, founder of Tovita Nutrition. “They’re the teeny-tiny versions of your favorite veggies and herbs like broccoli, kale, arugula, cabbage, watercress, basil, and cilantro, which are harvested after just seven to 14 days, when the first little shoots sprout,” she says. And, bonus: Studies show that microgreens have higher nutrient content than their full-grown counterparts—and it’s 100 percent bioavailable, meaning your body can easily absorb the vitamin, mineral, and antioxidant goodness.
Though some people confuse microgreens with sprouts, they differ in several ways. First off: no seeds. Since they’re grown in soil (instead of water, as sprouts are), microgreens are harvested above the soil level—so you only get leaves and stems. And finally, because they are grown in soil, microgreens soak up more nutrients than sprouts do.
The most popular seeds used to grow microgreens include broccoli, buckwheat, cabbage, cauliflower, chia, mustard, and sunflower. These seedlings are the easiest to grow, which is a definite perk for gardening newbies. Once you start to hone your harvesting skills, you can branch out and grow some of the other trendiest microgreens, including lettuce, kale, spinach, radish, beet, and watercress.

How to start a microgreens kitchen garden
Follow these eight steps to get this garden party started.
1. Gather your gardening tools
Microgreens should be planted in a small, shallow container (your typical salad bar takeout container is a good size to shoot for). You can use a nursery flat if you have one on hand, but if not, don’t fret. You can reuse a clean plastic food container from a restaurant or the supermarket, but be sure to poke a few drainage holes in the bottom. The only other materials you need are moistened potting soil or mix and your seeds of choice.
2. Fill your container with soil
Use your moistened potting mix to fill the container with about an inch or two of soil. Press the soil down with a piece of cardboard or the back of your hand so that the surface is level and smooth; avoid pressing too hard and over-packing the container.
3. Scatter your seeds
Add an even layer of seeds to the top of your potting soil. You should scatter more seeds than you would if you were planning to harvest full-sized plants, as this will increase your yield of microgreens. Gently press the seeds into the soil. Pro tip: If you want to speed up the sprouting process, soak your seeds in water overnight before you plant them.
4. Layer potting mix and mist the soil
If you have a wire-mesh sifter, you can use it to lay down a very fine (1/8-inch) coating of dry potting mix over the seeds. Then use a spray bottle to spritz the soil until it is damp.
5. Place your container on a windowsill or under a grow light
Your microgreens need several hours of direct sunlight daily, preferably from a south-facing window, in order to thrive. If you don’t have access to a sunny ledge, you can mount grow lights under cabinets and care for your seedlings on the kitchen counter.
6. Mist your seeds daily
While you wait for your seeds to sprout, mist the soil in the container a couple of times each day. Take care not to overwater your plants; mist them only until the soil is damp.
7. Harvest the fruits of your labor
Within three to seven days, you should notice the first sprouts. When the first “true leaves” appear—typically about two to three weeks after you first plant the seeds, depending on the variety you chose—it’s time to harvest your first crop of microgreens. Simply use scissors to snip the stems just above the soil line.
8. Serve and store your microgreens
Your seedlings will taste best when served immediately after they are harvested. Rinse the microgreens and dry them with a paper towel before serving. Microgreens can be added to everything from sandwiches, salads, and omelets. You can also blend them into smoothies or juices, or use them to garnish your favorite hot entrees. Store any leftovers in an airtight container in your refrigerator to keep them as fresh as possible. But above all, after your green-thumb efforts, enjoy! And start your dinner party guest list ASAP, since you’re going to want to cement your status as a friend with (the most nutritional) benefits.
Another room in your house that could use some plant love? Your bathroom. And throughout your home, these are the plants that will actually clean up your air.
Sign Up for Our Daily Newsletter
Get all the latest in wellness, trends, food, fitness, beauty, and more delivered right to your inbox.
Got it, you've been added to our email list.


