Your guide to perfectly-roasted vegetables, straight from a top chef
Looking for a healthy, fool-proof way to cook vegetables tonight? Here's exactly how to roast vegetables like a pro chef (without burning them to a crisp).
Your guide to perfectly-roasted vegetables, straight from a top chef
Looking for a healthy, fool-proof way to cook vegetables tonight? Here's exactly how to roast vegetables like a pro chef (without burning them to a crisp).
Yes, eating vegetables can be delicious (and easy). Here’s how.
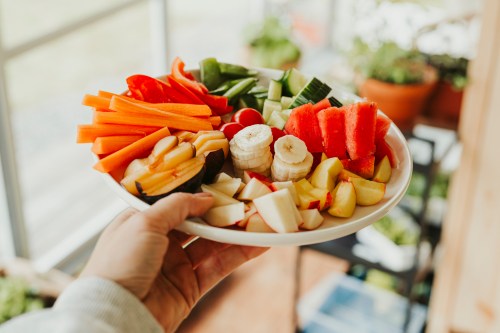
One of the great things about vegetables is their versatility. From sautéed veggies to more creative cooking methods (zoodles, anyone?), there are countless ways to get your daily dose of greens. But according to celebrity chef Sam Kass, the best way to eat your vegetables is to roast them (our favorite way to cook beets).
“For me, roasting is one of the best ways to prepare vegetables,” he says in the latest episode of Well+Good’s new show Cook With Us. “It brings out so much flavor, and it’s super simple—you just throw them on a sheet tray and throw them in the oven.”
But how to get that perfect, Goldilocks-like balance of tenderness and crunch…without setting your kitchen on fire? Never fear. Kass, who previously served as President Obama’s White House Chef and Senior Policy Advisor for Nutrition (NBD…), offers a few tricks on exactly how to roast vegetables to perfection every single time.
In general, he recommends getting your oven as hot as it can get and letting them bake for about 20 minutes. (Note: This might vary depending on your oven make.) Toss your vegetables beforehand in your favorite oil (such as avocado or olive), add some of your favorite seasonings or spice mixes, spread them out on a sheet pan, and you’re good to go.
The second trick to getting a rich, deep roast might surprise you: “I often broil my vegetables,” Kass says. “Turn the oven on, get it really hot, and then turn the broiler on and throw them in.”
These roasting techniques, Kass says, work for practically any vegetable. “There’s no right or wrong,” he says. The only wrong thing would be to skip topping your roasted vegetables with Kass’s signature turmeric dressing. Watch the full video here for the complete recipe and see for yourself just how easy his meal is to make on your own.
If you live with a food allergy, you already know the vigilance needed to shape and plan a menu or celebrate a holiday with loved ones. Enter a meal that’s heavy on allergens, like brunch, and the challenge intensifies.
advertisement
According to the Asthma and Allergy Foundation of America, about 20 million people have a food allergy in the United States—that’s about 6 percent of all adults and children. The most common allergens are milk, eggs, peanuts, tree nuts, fish, shellfish, wheat, soy, and sesame (which is a rising food allergy that impacts 1 million Americans).
With those statistics, even if you don’t personally have a food allergy, you likely know somebody who does. That means brunching together may take a little extra planning, but it can make all the difference in helping someone feel cared for. “Accommodating guests with restrictions takes time and research, but the joy of inclusivity is priceless,” says Ashley Lonsdale, chef-in-residence at ButcherBox.
“Of all meal periods, brunch tends to have the most diverse menu,” says James Beard award-winning chef Galen Zamarra, of Le Depot Brasserie in Park City, Utah, where he creates a brunch that provides several options for guests with allergies. “You often find a little bit of everything, ranging from more traditional breakfast dishes to lunch items, sweets, savories, and so forth,” he says. “Because of this diversity in the menu, you see all sorts of ingredients.”
One of the most challenging allergens? Eggs. They are incredibly unique and used in a bunch of culinary techniques—especially when it comes to breakfast—that can’t be replicated in the same way that you might swap in, say, oil for butter. (Though there are a few egg alternatives you can try.)
“There are egg substitutes and tofu is a great swap if you’re looking for protein,” adds Zamarra. “But from a [breakfast] perspective, egg swapping is a challenge. It’s hard to make eggs benedict or a quiche without eggs.”
Then, you have to consider the allergens that can sneak into recipes in more subtle ways. For instance, brioche is a common brunch bread—and while most people know there’s gluten (wheat) in it, they may not realize it also contains eggs and dairy. Often, batters for pancakes and waffles also include melted butter or egg, which isn’t always so obvious.
Mix in upcoming spring holidays like Easter and Passover, with their staple dishes of deviled eggs, matzo ball soup, carrot cake, and charoset, and you’re navigating a landmine of common allergens.
5 Allergen-Friendly Brunch Ideas
All of that said, creating an allergen-free brunch doesn’t need to be stressful. Instead, it can be an opportunity to get creative, have fun with new dishes, and improve your cooking skills. Here are five tips for seamlessly incorporating allergen-friendly foods into your menu.
1. Try a family-style meal
One of the best ways to accommodate all of your guests is to create a varied spread that allows them to pick and choose what goes on their plate. “Allow guests to build their own plates and keep toppings separate to make managing their diets easier,” says Lonsdale. “I'm a big fan of a family-style brunch.”
advertisement
One option is to create a mezze-style brunch that includes dishes like (tahini-free) baba ganoush, olive tapenade, beet hummus, grilled eggplant, stuffed grape leaves with rice and herbs, and grilled chicken skewers.
“Everybody loves something where they can share and have lots of different things to try,” says Emilie Symons, chef-instructor of Plant-Based Culinary Arts at the Institute of Culinary Education. “I find that's very enticing for people and very engaging as well.”
2. Lean into vegetable-forward dishes
Vegetable dishes like stir-fries or even fresh plates can offer a colorful addition to your brunch spread, and typically can be made without common allergens. “One of the great things about brunch is that you can serve lots of vegetables, unlike at breakfast, a meal that doesn’t often feature vegetables,” says Zamarra. “Tomatoes, avocado, and spinach are all great foods to liven up a menu.”
A favorite dish of Zamarra’s: Sweet potatoes—think a crispy sweet potato pancake—with avocado, smoked salmon, and dill.
Rice bowls can also be an easy way to integrate vegetables into your brunch menu.“I always stock a few different kinds of rice like jasmine, short-grain brown rice, and red rice or wild rice,” says Lonsdale.
3. Diversify how you pick your recipes
Introducing more variety into your menu to adapt to certain guests may mean not including traditional dishes like your aunt’s beloved strata for every brunch, but that’s not necessarily a bad thing. “Try not to hold things too closely, know your audience, and be adaptable,” says Symons. “It’s a great opportunity for you as the cook to expand your culinary horizons.”
If you or a guest are allergic to wheat or have celiac disease, it can be challenging to find a substitute for toast or pancakes. Instead, incorporate different global cuisines into your brunch menu that are naturally allergen-free.
“Create a spread around naturally gluten-free baked goods like Venezuelan arepas, made with a type of corn flour, stuffed with savory chicken salad—or French socca, made with chickpea flour, with smoked salmon and dill,” says Lonsdale. “Breakfast tacos with corn tortillas and bacon are also always a triumph.”
4. Create DIY stations
Similar to family-style meals, DIY “stations” give your guests the option of customizing their plates, which double as a fun opportunity for them to get creative. This could be a waffle bar, omelet station, or a porridge bar with allergen-free staples like dairy-free butter, egg substitutes, and gluten-free oats.
advertisement
“Oats are naturally gluten-free, but they are grown in an environment that also sometimes grows wheat,” says Symons. “That said, you can purchase oats that are specifically labeled as gluten-free—making them a pretty easy allergy-friendly food.”
A customizable bar gets your guests engaged and participating in the experience, making an inclusive meal naturally fun.
5. Label your dishes
If you or a guest have a food allergy, it’s best to simply create your brunch menu around that allergy—but if an allergen must be present, just label any dishes that contain common allergens. It takes the guesswork away from the brunchers, and also gives you peace-of-mind without having to over-explain every dish multiple times.
“That way, they know anything unmarked is fair game instead of having to search for safe items,” says Lonsdale. “If a seating chart is involved, seating guests with similar allergies together makes serving easier.”
Another option is to label everything, so those who have allergens don’t feel singled out—and those who don’t have allergies are enticed to try new things. “I like it being more collaborative and more inclusive in that way,” says Symons. “Because if you have a food allergy, you might feel like you're the odd one out.”
Recipe: Socca With Smoked Salmon & Greens
Lonsdale offers an easy foray into socca—a savory pancake of sorts, originally from Nice, France. “Its appeal is undoubtedly its crispy edges and custardy center,” says Lonsdale. “The simplicity makes this recipe easy to center a brunch around, best served on a table crowded with delightful sides and toppings to suit everyone's preferences.”
Quick tip: Remember to start the night before so the batter can rest!
Serves: 4
Ingredients:
advertisement
1 cup chickpea flour
½ teaspoon ground cumin
½ teaspoon Kosher salt, plus more to taste
Freshly ground black pepper, to taste
¼ cup olive oil, divided, plus more for dressing the salad
4 ounces tender salad greens
½ medium red onion, thinly sliced
2 tablespoons fresh lemon juice
8 ounces smoked salmon
Fresh dill and (dairy-free) sour cream, for serving
Steps:
1.
In a medium bowl, whisk together the chickpea flour, 1½ cups of water, cumin, and ½ teaspoon salt. The batter will be very thin and have a consistency similar to whole milk. Cover and allow the batter to rest overnight.
1.
Place a 10-inch cast-iron skillet in the oven and heat to 475°F. Whisk 2 tablespoons of olive oil into the batter. Remove the hot skillet from the oven and add the remaining oil, swirling to coat the bottom of the pan. Add the batter and bake for 20 to 25 minutes, or until the socca turns a deep golden brown.
1.
While the socca bakes, dress the greens: In a large bowl, toss the greens and red onion with lemon juice, olive oil, and salt and pepper to taste.
1.
Remove from the oven and let the socca rest for 5 minutes, or until it firms up slightly. Transfer the socca to a cutting board and slice into 8 wedges. Sprinkle with fresh dill and serve with the salad, smoked salmon, dill, and sour cream.
Sign Up for Our Daily Newsletter
Get all the latest in wellness, trends, food, fitness, beauty, and more delivered right to your inbox.
Pickling is one of the greatest culinary tricks of all time. And honestly, as a dietitian, I can’t recommend it enough. It doesn’t just give your veggies a new lease on life—it turns them into tangy little nutritional powerhouses, fending off food waste and spicing up your meals all at once. What’s not to love?
advertisement
If you aren’t on the pickling train yet, soon you will be. So if you aren’t ready to invest in some pickling jars, consider yourself warned.
What is pickling?
For the uninitiated, pickling is a preservation process—which can be traced back to 2400 BCE—that involves soaking vegetables in a solution of vinegar, water, salt, and sometimes sugar and spices. While traditional pickling uses fermentation (as seen in sauerkraut or kimchi), and long-standing canning practices, quick pickling—aka the way I like to pickle at home—requires little more than your fridge and a jar. The result? Crisp, tangy veggies that can outlast an apocalypse (okay, not exactly, but a bit longer than their fresh, un-pickled counterparts).
The extended shelf life of pickled vegetables comes down to the acidity of the vinegar and the salt content, which create an environment that’s hostile to both bacteria and spoilage. This preservation method allows pickled foods to stay safe to eat for weeks or even months (depending on your method), making it a practical and delicious way to enjoy your favorite veggies over time.
What foods can you pickle?
Cucumbers may rule the pickling kingdom, but pretty much any veggie can be pickled. Got cauliflower florets hanging out in your crisper? Toss them in. Radishes feeling a little soft? Brine ‘em up. Even veggies you might not think of—like asparagus or jalapeños—can benefit from a little pickling TLC. The possibilities are endless (and delicious). P.S.: You can pickle foods beyond veggies too. I am partial to pickled figs and shrimp, myself.
Adding pickled veggies to your meals is like sprinkling a magic dust of zing and crunch. They’re perfect as a side, topping, or snack—and they fool everyone into thinking you’re a kitchen master. Pickled onions on a taco? *Chef’s kiss*. Pickled carrots in a salad? Instant pop of flavor and texture.
Are pickled vegetables good for you?
Here’s where it gets even better. Beyond their long fridge life and addictive tang, pickled vegetables can actually provide health benefits. The vinegar used in pickling has been shown to help with blood sugar management by slowing the absorption of carbs (a win for those watching their glucose levels), but more data is needed to confirm this. Plus, you’re still getting a good dose of vitamins, fiber, and antioxidants from the vegetables themselves. And since most Americans are missing the mark when it comes to their daily fiber intake, adding some pickled veggies to your dish can be an important addition to help bridge the gap.
Here’s the tea on food waste in America—nearly 40% of food produced goes uneaten. But here’s the thing, your fridge doesn’t have to contribute to that statistic. That leftover half a head of cabbage or those almost-too-soft carrots don’t have to meet a premature death in your trash can.
advertisement
Pickling quickly turns “this is starting to look iffy” veggies into “I can’t wait to snack on this” noshes that you can keep in your fridge all week. It’s a simple way to extend the life of your food and reduce waste—plus, you get to feel like an eco-conscious culinary genius while you’re at it.
How to start pickling at home
If you’ve read this far and aren’t already raiding your kitchen for jars and vinegar, consider this your invitation to jump in. Start small. A quick refrigerator pickle recipe can take as little as 10 minutes of effort. Grab some vinegar, experiment with spices (mustard seeds? black peppercorns? chili flakes?), and slice up any veggie that needs saving.
Pickling isn’t just a recipe—it’s a mindset. It’s about celebrating your vegetables, reducing waste, getting to enjoy out-of-season veggies whenever you want, and inviting a little extra zing onto your plate.
Sign Up for Our Daily Newsletter
Get all the latest in wellness, trends, food, fitness, beauty, and more delivered right to your inbox.