Our editors independently select these products. Making a purchase through our links may earn Well+Good a commission
After four long years, I recently threw down some of my hard-earned money for a cleaning service because, well, I didn’t want my incoming roommate to think our apartment was a mold factory. I am, let’s say, a little not-diligent about wiping my counter-tops—the cleaner was in my kitchen alone for three hours.
After this experience, I wanted to find a way to be less gross about the apartment, because you know, half a decade of bacteria build-up seems bad. That doesn’t mean I’ll be scraping out my fridge on the regular (lol) or doing my dishes every night (double lol), because who has time? Instead, I decided to develop a kitchen cleaning checklist that would help me tackle the germiest spots efficiently without having to spend hours at a time scrubbing away like a Brooklyn version of Cinderella.
Obviously I’m not a cleaning expert, so I decided to call on Jason Tetro, a microbiologist and author of The Germ Files, to help me determine the dirtiest kitchen spots that need the most love. If you’re feeling like being a little less disgusting, feel free to dive in with me on this magical disinfecting journey.
Your kitchen cleaning checklist, based on the most germ-infested spots
According to Tetro, the dirty four areas of your kitchen that should be cleaned most often are:
- 1.The area around your kitchen sink
- 2.Your cutting board
- 3.The handle of your refrigerator
- 4.The handle of your oven
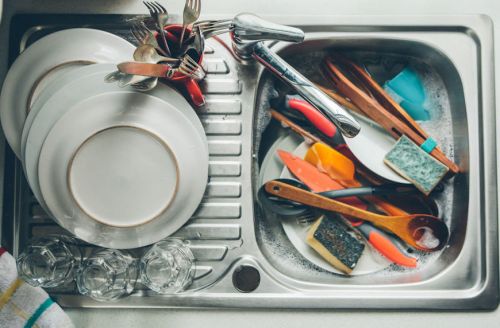
Surprised? I certainly was. While the cutting board feels obvious (you’re cutting food and potentially handling raw meat and other ingredients there), I felt betrayed by the kitchen sink part. You’d think the constantly running water would keep it somewhat clean, but most people wash the sink with a sponge, which is, plot twist, an absolute farm of bacteria. It potentially has more bacteria than your hands because it’s usually wet and warm, Tetro says, and bacteria tends to multiply in that kind of environment. Subsequently, your sink may have more E.Coli hiding out than a flushed toilet, which makes sense because you’re cleaning it with something that has more germs than a toilet. Do not like this one bit.
As for the handle of your fridge and oven, think about it: While you’re definitely washing your hands directly before eating or preparing food, you’re probably not thinking too hard about cleaning your hands when opening the fridge or the oven door. Hello, cross-contamination!
But wait, what about the dish rack and the fact that it’s constantly sitting in water? “Surprisingly the dish rack isn’t all that troublesome because it is used after you wash most if not all of the germs down the sink,” says Tetro. “Mind you, it still can get residue buildup and that makes it look rather gross.”
So yeah, if you do nothing else in the way of cleaning your kitchen (because you are me, a slightly less hairy Oscar the Grouch), this is what you should be focusing on. All of these areas are chockfull of germs and need a little TLC to be way, way less gross.
Okay, ew, how please tell me how even clean these areas
According to Tetro, you want to follow proper infection prevention guidelines, and dear God, please stay away from sponges on this one.
- 1.Dilute bleach or hydrogen peroxide disinfectant
- 2.Spray on the area
- 3.Let sit for one minute
- 4.Rinse thoroughly with water
- 5.Dry with a clean towel
“You want to do this every time you use raw foods especially meats as you never quite know what you may have touched,” Tetro says. “If you don’t want to do it that frequently, make sure to do it at least once a week.”
As for your sponge (which for the love of God you should be cleaning too!), Tetro’s got a solution for you too. “For the sponge, you can soak it in boiling water or you can soak it and then put it in the microwave for two minutes on high,” Tetro says. All the while, make sure to change your sponge every two weeks to a month… or sooner, if that whole “Taking Spongebob to Chernobyl” thing doesn’t look like it’s sticking.
Armed with this knowledge, I think that together we can make our kitchens a less revolting place. All we need to do is be good about our sponges, keep our handles nice and bleached, and commit to cleaning our dishes like, bi-weekly.
I was going to say “daily,” but I’m a realist.
Once more, with feeling: this utensil holder is sneakily hiding some bacteria. And you do not want to miss this spot on your Instant Pot.
Sign Up for Our Daily Newsletter
Get all the latest in wellness, trends, food, fitness, beauty, and more delivered right to your inbox.
Got it, you've been added to our email list.


