There’s nothing quite like waking up early on a Saturday to take charge of your weekend by starting it off with a Pilates sweat sesh. It’s also true, however, that doing so on the reg can start to make a dent in your wallet. If you love the strength that comes with stretching on reformers and the excitement that accompanies trying to stay steady on the carriage, but can’t always make it into the studio, you’ll be glad to know that there are an array of Pilates exercises that you can do from the comfort of your own home.
Since many trainers understand that heading into the studio each and every day is pretty unlikely, two of the industry’s top instructors shared their 10 favorite movements that will make your muscles quiver and help you to stand straighter thanks to a stronger core. Keep scrolling for their advice below.
Try these Pilates moves for better posture and a stronger core
1. Criss cross: “Lying on your back, draw bent knees into tabletop, interlace fingers behind the head,” instructs Heather Anderson, the founder of New York Pilates. “Exhale to nod and curl your head, neck, and shoulders off of the ground.” For more of an advanced movement, incorporate a Pilates ring into the exercise. “Place it so that the pads are resting between the right elbow and left bent knee,” Anderson says. “Rotate at the ribcage to increase pressure from the right elbow into left knee on the ring as you extend the right leg long on a 45-degree angle. Return the right leg to tabletop as you slightly release pressure on the ring and repeat 10 times.” For even more of a challenge, Anderson recommends holding the rotation towards the left knee and, with your right leg long, pulse into the ring.
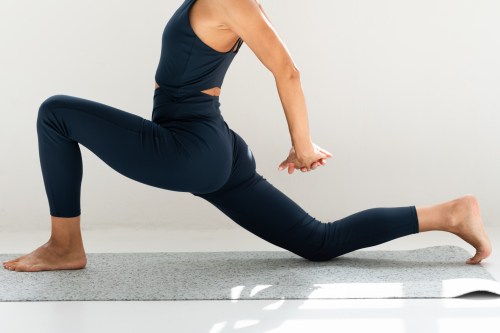
2. Escalator lunge: “When you’re not using a megaformer, place your working foot on the floor and your supporting foot on a slider, towel, or paper plate,” says SLT instructor Melody Davi. “Slowly lower down into a lunge and rise on a four count. Make sure to keep your working knee over your ankle, back leg straight, and add a slight tip forward at the pelvis.”
3. Hundreds: “Begin on your back, knees in tabletop, low spine in ‘neutral,’ hands reaching long by your sides,” instructs Anderson. “Inhale, and as you exhale nod and curl your head and chest up. Begin to pump your arms up and down one inch as you inhale for a count of five, then exhale for five, going back and forth for a total of 100 counts.” For an added Pilates hundred challenge, Anderson suggests reaching your legs out straight at a 45-degree angle. “Keep your shoulders stable as you pump the arms up and down by giving the back of your armpit a little squeeze (activating your rotator cuff muscles),” Anderson reminds.
4. Plank to pike: “Start with hands on the floor (arms straight) and toes on a slider, towel, or paper plate with your legs straight,” instructs Davi. “Pike and lower the hips on a four count. Think: Less ‘lift my hips high’ and more ‘bring my ribs towards my hips’.”
5. Tricep push-up: “Start in a plank with shoulders stacked over wrists, the belly drawn up and in, and pelvis slightly tucked,” guides Anderson. “Lift one leg long behind you as you bend the elbows in towards the waist for a tricep push-up, with one leg lifted. As arms straighten, the lifted leg lowers back down to the floor.” Between each push-up, return to a solid plank and alternate leg lifts for each. “It’s super important to keep the pelvis as still as possible while moving—use the engagement of your abdominals to find stability,” advises Anderson.
6. Side crunch bear: “This oblique exercise starts with hands on the floor, feet on a slider, towel, or paper plate,” explains Davi. “From a plank position, twist hips away from the working side (so: if you’re working your left oblique, your hips face right). Slowly bend and extend the legs on a four count, keeping the hips twisted at shoulder height.”
7. Side plank with leg lower and lift: “Begin in a kneeling side plank, keeping shoulders and hips stacked one on top of the other,” says Anderson ays. “Press up and out of the heel of your stabilizing hand to avoid sinking into the shoulder.” That arm that’s not holding you up can extend straight up or stay down at your side. “Extend the top leg straight out from the hip socket so that it is lifted and parallel to the floor,” Anderson instructs. “Begin to lower and lift the leg up and down within a range of about five inches from your starting point.” When performing this movement, she reiterates just how important it is to move slowly so as to really nail the form and feel the muscles working in the low glutes.
8. Skater: “Start by placing a mini resistance band loop around ankles,” says Davi. “Assume a low squat by bending knees and hanging hips back. Keeping torso and pelvis completely still, slowly bend and extend the non-working leg while keeping working leg and hips completely still for a full four-count.
9. Bridging: “Lay on your back, knees bent, feet flat on the ground hip-distance apart,” says Anderson. “Begin by lifting your hips up to a shoulder bridge, and be sure your abs are engaged to keep ribs from flaring open and lower back from arching. A good reference is that your knees to shoulders are all one long line and there should be no discomfort in your low back. From there, lower your pelvis down like you are sitting in a chair, the ribs go with the pelvis so that they do not flair open and back does not arch. Then you lift your pelvis right back up. The whole action should be driven by those glute muscles.”
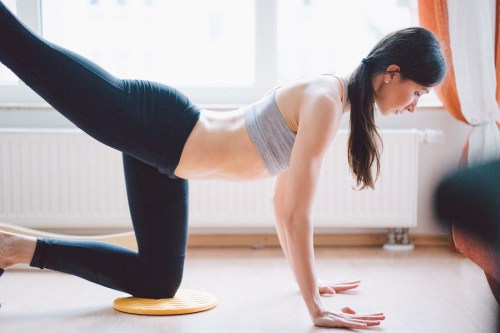
10. Cobra: “Begin in a modified plank with you hands on the floor and knees on sliders, a towel, or paper plates,” explains Davi. “Slowly saw shoulders behind wrists and lower down to both forearms at the same time. Reverse the move by pressing into palms and shifting your weight forward until arms arm straight, shoulders over wrists. Make sure to keep hips completely still.”
For another way to get your moves in on the mat, try this pilates ring workout:
Stoked for the at-home pilates moves? You’ll love this pilates floor workout, too. If you’re feeling adventurous, try pairing it with a trusty plank series for a full-body burn.
Sign Up for Our Daily Newsletter
Get all the latest in wellness, trends, food, fitness, beauty, and more delivered right to your inbox.
Got it, you've been added to our email list.
