Our editors independently select these products. Making a purchase through our links may earn Well+Good a commission
My Potted Plant Was on the Verge of Death Before I Drilled a Drainage Hole
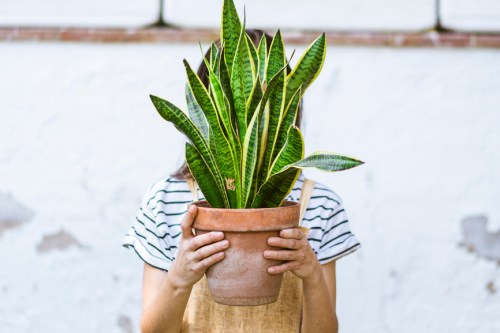
Improving potted plant drainage is easy and something you can do yourself with almost any pot. Here's what to do to keep your plants alive.

If you don’t innately have a green thumb, but you’re doing your best to care for a potted plant, you likely have more than a few plant tips committed to memory. Chances are, you’re well aware of the need to cater your plant’s position based on the lighting they need and you likely even know that different plants require different watering schedules. What you might not know, however, is that without a proper drainage system, watering your potted plant even the correct amount can lead to wilted, yellowing leaves. And let’s be honest, that can feel downright confusing—not to mention frustrating—when it feels like you’re doing everything in the best interest of your plant.
Experts in This Article
plant expert and lead floral designer at The Bouqs Co.
gardening expert at Bloomscape
With that in mind—and in an effort to help you stress a little less about the plants in your home—we chatted with two plant experts about how to improve drainage for pots. Good news: It’s easier than you might think.
Why is drainage important for potted plants?
It’s simple: Plants need water to survive but, according to plant expert Kaylyn Hewitt, who is the lead floral designer for The Bouqs Co., most plants can’t tolerate damp soil for an extended period of time. That’s why many (but not all) pots come with drainage holes.
“Drainage holes allow your plant to receive the water that it needs while making sure that any excess water does not sit in the pot and cause your roots to rot,” she explains. “They also help to curb any overwatering that may happen.” While drainage holes won’t entirely mitigate the effects of overwatering, Hweitt says that they do temper the amount of water your plant actually absorbs.
While on the topic of water, Bloomscape gardening expert Lindsay Pangborn wants to reiterate that watering deeply and thoroughly is a best practice for happy plants, as it encourages growth throughout the entire pot. “But without a drainage hole, it’s impossible to achieve deep watering without drowning your plant,” she explains. “Pots with a drainage hole make it easy to thoroughly water your plant every time without fear they’ll suffer from root rot.”
Another benefit of drainage holes in pots
Beyond acting as an outlet for excess water, Pangborn says that drainage holes also make it easy to monitor the root conditions of your plant. “If roots are beginning to grow through the hole at the bottom of the pot, it can indicate the need for a bigger pot as the plant continues to grow,” she explains. “If water rushes quickly through the pot, that can be an indication that the soil-to-root ratio is too low (meaning there isn’t enough potting soil to properly support the roots) and the plant could benefit from repotting.”
How to drill a drainage hole in a ceramic and terracotta pots:
What to do if your pot doesn’t have a hole—or if you don’t want to drill one
Point blank: Drainage holes are essential. If your pot doesn’t have one, there are plenty of videos on YouTube showing how to safely and effectively drill one into the bottom of your pot. Still, if you’re drilling into a fragile item (like Terracotta or ceramic), you’ll want to be especially careful so as to not shatter the pot and accidentally cut yourself in the process.
On the other hand, if you don’t want to drill a hole into your pot in fear of breaking it (something that Hewitt says she can relate to), you have another option. “Use an inexpensive planter (my go-to is terracotta) with a drainage hole, and then place that into your decorative pot,” she says.
The main reason it’s so important to improve drainage for pots is because root rot can quickly kill a plant. So, if your goal is to keep your plants alive for as long as possible, it’s essential to know how to identify root rot in the first place.
“When root rot happens, it means that the plant’s roots are damaged to the point that they can’t function properly, which is why some signs of overwatering are so similar to signs of underwatering,” Pangborn says. “You can identify rotting roots by checking for black or brown spots on the leaves, often edged in yellow. Yellow or wilting leaves can be another sign of root rot—if the soil is moist, but the leaves are wilting, that’s a sign that the roots aren’t functioning properly.”
If you find that your plant is suffering a case of root rot, don’t panic—at least not immediately. If the root rot is not too extensive, Pangborn says that the plant can be treated. “Lift the plant out of its pot, gently remove the soil, and trim all rotting roots with a sharp pair of snips,” she instructs. “Since the root system size will be reduced, you’ll also need to remove a proportionate amount of top growth (so, if you remove about ⅓ of the roots, remove about ⅓ of the leaves and stems).” Once you’ve done so, Pangborn says to re-pot the plant in fresh potting soil, water sparingly, and keep the plant in bright but indirect light. “Additional watering should not be needed until new growth emerges.”


