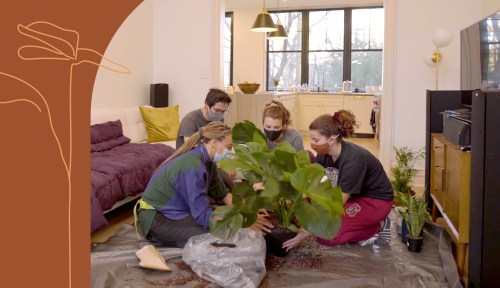
Bringing home a new plant is so satisfying. And if you’ve ever wondered whether you should repot a new plant, the answer is yes. Step one in caring for your new plant is freeing the roots from the tight grow pot and getting it settled into a roomy new planter. To help you and your leafy friends get off on the right foot, plant doctor Maryah Greene is here to show you how to repot a new plant in a way that makes it feel right at home.
Experts in This Article
plant expert and founder of Greene Piece
In the latest episode of Greene Thumb by Well+Good, a new series on the Well+Good YouTube channel, Greene works with a group of roommates in Brooklyn who want to add a little greenery to their new apartment. She helps them choose and repot new plants for the space. You’ll learn so much from Greene’s tips. For example, I learned that I’ve never correctly repotted a plant. Keep reading for Greene’s tips and watch the full video above for the breakdown.
Yes, you should repot your new plant—here’s how to do it right
1. Massage and remove grow pot
Before you can even think about removing your plant from the grow pot, you need to massage the pot a bit.”We need to massage [a plant] before we pull it out because if we just yank it out the roots fall apart,” says Greene. Start pushing on the sides of the pot and you’ll start to feel the soil and the roots loosen up.
For super big plants, you’ll want to cut the grow pot before you remove it. Tilt the plant on an angle and cut a straight line from the top rim to the base of the pot to give the roots more room before you remove it. Have a bag ready that’s big enough to fit the base of your plant and slide the plant out of the pot and lay the plant on its side with the dirt and roots on the bag.
2. Loosen the roots and remove old soil
“Roots are key to your plant survival,” says Greene. “You want to make sure you give your plant’s roots attention when you first purchase it so that it has a greater chance of success.” When you remove the grow pot, you’ll notice that all the roots are tangled at the bottom. Now that the plant is on its side, start to loosen the roots up letting the excess dirt fall into the bag.
“When brushing away soil from the nursery pot, Get rid of as much as possible without damaging or disrupting the roots,” she says. “You’ll know you’re done clearing old soil when the roots are elongated, no longer nestled in that circular shape of their nursery pots and ready for their new homes.”
3. Place your plant in its new pot
Get a pot that’s two inches wider than your grow pot. Using the right soil for your plant, fill the pot up about a third of the way, making sure there’s enough that your plant can sit on it and not be too deep in the pot. Add the plant and add more soil to the sides and top, leaving about a half-inch to an inch of space between the dirt and the rim of the pot.
4. Fully water the soil
Once your plant is settled into its new home, it needs a lot of water. “The first time that you water plants all of its soil is dry,” says Greene. “The next time you water it, you’re only going to do half [as much].” When watering, go side to side in a zig-zag motion to soak all of the soil.
Oh hi! You look like someone who loves free workouts, discounts for cult-fave wellness brands, and exclusive Well+Good content. Sign up for Well+, our online community of wellness insiders, and unlock your rewards instantly.
Sign Up for Our Daily Newsletter
Get all the latest in wellness, trends, food, fitness, beauty, and more delivered right to your inbox.
Got it, you've been added to our email list.


